There really is no need to…

… because I’m about to show you one of the simplest crafts to ever grace this blog. In fact, I’m fairly confident in asserting that it is probably one of the simplest crafts EVER in the history of ALL crafts. So don’t fret, no. Just sit back. Relax. Take a load off. This won’t take but a minute.
I give you the…

Let us begin.
All you need is love. And some form of cardboard tube. Like a toilet paper roll say, or a kitchen roll tube.
Ascertain how you’d like to label your shelves. I needed to be able to locate my painting and drawing supplies at a moment’s notice, so that’s what I chose to write on one of my tubes.
Now, take your tube. And now take your pencil.
Am I going too fast? Are you able to keep up with the sheer complexity of this craft? Good.
Now, write your chosen words in pencil on your chosen tube. I chose the words “painting & drawing”. Don’t be afraid to get VERY specific. Your children will thank you when you order them – or in my case, ask them nicely – to go to the “Painting and Drawing Shelf” to get the #47 red.
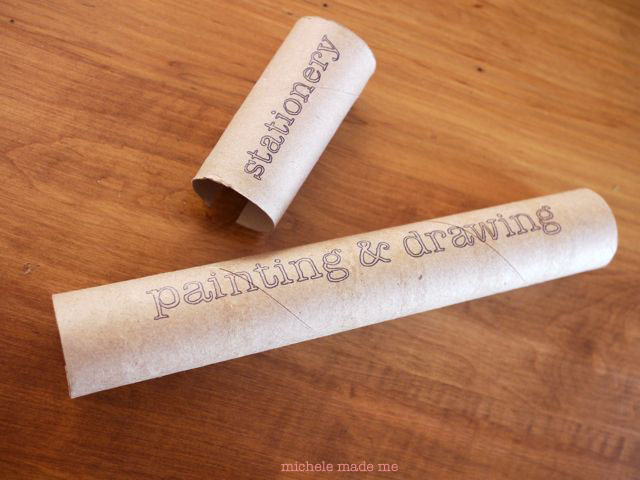
Trace around your words with a fine-tipped Sharpie.
Note: Sharpie is a very famous brand of marker here in North America. They are literally everywhere.
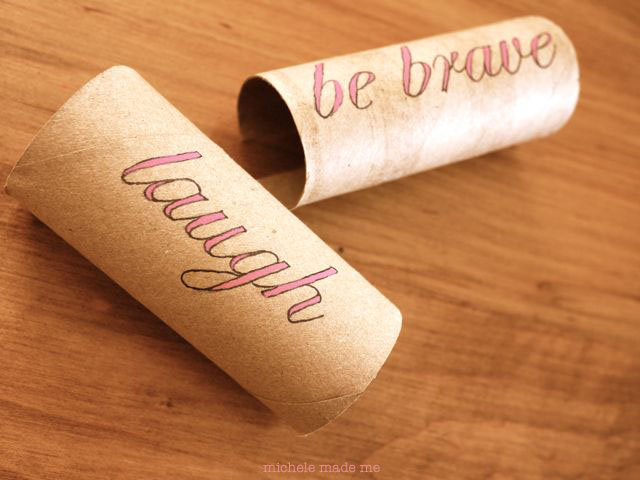
If you like, you can also add colour to your words with paint or colourful markers as below.
Alternatively, if you are down and out, you may decide to forego the labels entirely, and instead give yourself a lively boost with a few choice words of wisdom. “Be brave” or “Laugh” for example. As you know, it is essential to occasionally laugh or be brave. Sometimes both at once. So these tubular concoctions work perfectly to jog a sluggish memory.
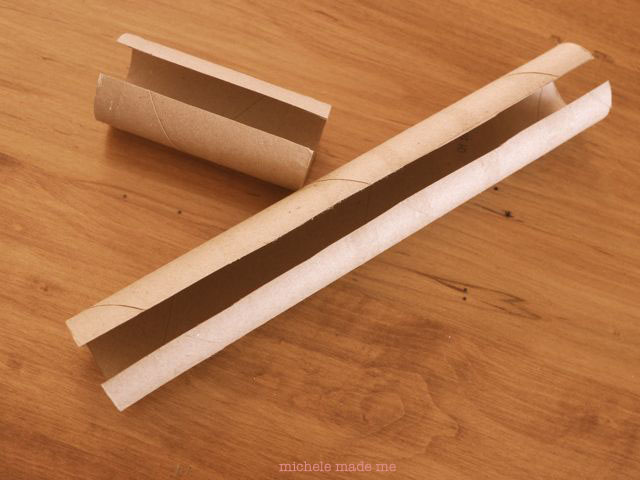
Once you’re done with the words, flip the tube to the other side (or 180˚) and cut it lengthwise as below.
Finally, it is time to place your tube on the shelf edge. Gently pry open the back of the tube and clamp it in place. It will look like it is eating the shelf. It isn’t of course. It’s only a card tube.
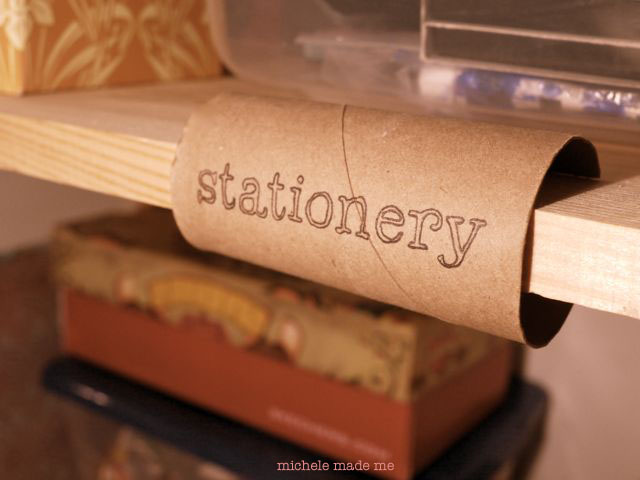
And now you will never forget where you put your stationery supplies. If you do, be brave and/or laugh. But don’t come crying to me.
I adore the simplicity of this so clever diy!!!! Michele you are really great!!!
Thank you for sharing,
love, xoxo Alessandra
You’ve made me smile with this simple but clever idea!!
My shelves are behind doors (thank goodness for that), there’s enough clutter left on the floor, so I need to find a way to make lables to put on the doors without damaging them! Any… idea… ?
Fabulous idea Michele!! I love it!
Super idée !!!
Nadia
Such a clever idea!
Hi Michele,
What a great idea…And I can uuse that to make reminder for my husband…
Big hug,
Giac
what great fun!!
I must show your blog to the gals at the local scrapstore where they get shed loads of fabric and carpet rolls handed in to them for play scrap.
So many of your ideas they could make up as samples to inspire members who go there.
I love this idea and will try and find space on my shelf edges to fit them! My shelves seem festooned with stash right up to the edges though……..a sure sign I need to tidy up some lol
Another fantastic idea thank you!
Have I told you recently that I think you are brilliant? No? Well, I think you are brilliant. There.
The simplest ideas are often the best – this is such a great idea!
One reason more not to throw away those toiletpaper rolls 🙂
Absolutely GREAT tutorial. The simpler the better, I love it. Could help me find something in my storage room!!Thanks
Oh my sainted toilet paper roll! This is amazing and I love both the concept (genius) and the beautiful calligraphy you have done. So stylish and elegant, and so change-my-life useful. Thanks for a great one!
Great idea! I hope I can handle this tedious project! Can you tell me one thing though? Do they stay put?
So far so good Judy. 🙂
Oh this is such a great idea! Have you thought about making them waterproof so you can wipe them when they collect dust? I'm just wondering what will make them waterproof though.
You could always Mod Podge them so the surface is smooth. It would make it easier to dust them.
You could always wrap them in clear contact paper.
What a great idea! You are a creative genius!
What a clever idea!
But wait. There is a glaring design flaw! You assume there is a strip of vacant space on the front of my shelves to fit said easiest craft in the world. No so! Darnit. I'll have to fold everything smaller.
Super smart dear Michele 🙂 you always share something more interesting than before 🙂
U R a Genius! I love them!
Hugs
Again with the clever darling ideas! Sheesh…and look at your lettering. WEll done.
You are amazing… how do you do it… thanks needed this one for sure..
Hi Michelle, I think I can compete with you for simplest craft ever:
http://craftyjournal.com/bug-scoop-for-the-squeamish/
And I neglected to say that I love your really simple idea for shelf labels!
That is The. Best. Idea. Ever!
How perfect! Simple, fun, stylish. Great, Michele!
This idea is a perfect addition to all the organizing stuff I've been making for my kids out of cardboard! Thanks for taking my thinking about cardboard tubes in a new direction!
Brilliant! I have oodles of TP tubes that I am always looking for ways of using.
Thanks!
Do you mind if I pin this to Pinterest??
Thanks!
~Michelle
simple, great idea!!! 🙂
These are so great!! Such a simple idea, but so impressive at the same time!! Love it!!!
How in the world did you get so brilliant? And can you teach me???
Truly brilliant.
How do you think of these things, you genius, you!!!
Just brilliant, Michele! Wow- I am going to start saving my paper tubes! You are such an inspiration to me to re-use and re-purpose things that we normally just toss out. Have you ever shared how you organize/store your recyclables for crafts? I'd love to know!
I just re- read this post. Not only is this craft brilliant (see my comment above) BUT your writing style is so …. well, it is just so, um, what's that word? BRILLIANT!! Yep. That's it.
okay – why do I love these so much?? Because they are brilliant!!!
I love this. I'm busy getting our "homeschool room" done and was thinking of ways to label all the supplies and this is just perfect. Thank You. 🙂
Are you kidding me? How easy is that? Why can't I think of ingenious things like that?
Thanks for sharing!