Yesterday the boys and I had planned to do yard work all day but as it happened, not only did Mother Nature have other plans (it was cold and rainy out), but Lo was feeling somewhat under-the-weather. So we all decided to stay ensconced in the warmth of our house. Of course that meant coming up with something to keep the Boy occupied. Now, I usually have some kind of crafty back-up plan up my sleeve for such an occasion. Yesterday, Plan B involved making one-of-a-kind placemats.
Now the Boy loves to craft. It’s in his blood. But Lo. When I asked him if he wanted to make a placemat I wasn’t actually expecting him to say “Sure.” But he did! AMAZING. CRAZY. ( I thought it must be the virus talking or something…) But he actually sat down with us for probably about 2 hours helping the Boy, creating his own design, cutting the pieces. And the Boy! He had so much fun, he made two different placemats! It really was a great family rainy day activity!
Here’s what we did…
Tutorial: Kid and Grown-up Placemat Fun
You will need:
- Fabric scraps
- Fabric pieces (roughly 12″x 18″), 2 per placemat (1 for front, 1 for back)
- Batting pieces ((roughly 12″x 18″), 1 per placemat
- Fabric binding
- Fusible web
- Pins
- Pair of scissors
- Iron and ironing board
- Sewing machine with darning foot
- Needle and thread
Note: Nothing was bought specifically for this project. I found everything in my stash! Bo-nus!
1. Take one of the 12″ x 18″ fabric pieces. This is your base fabric.
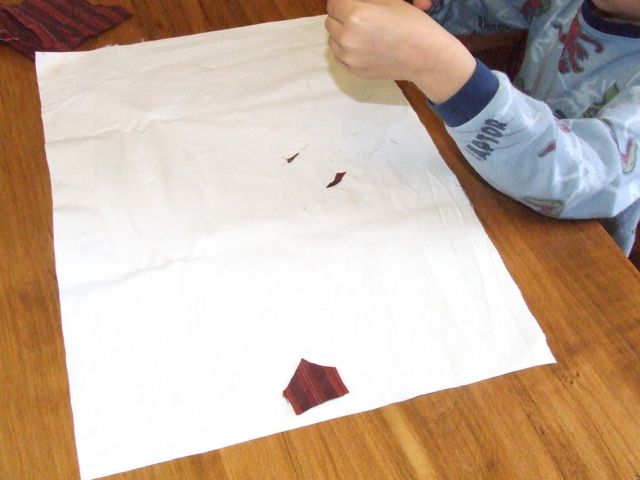
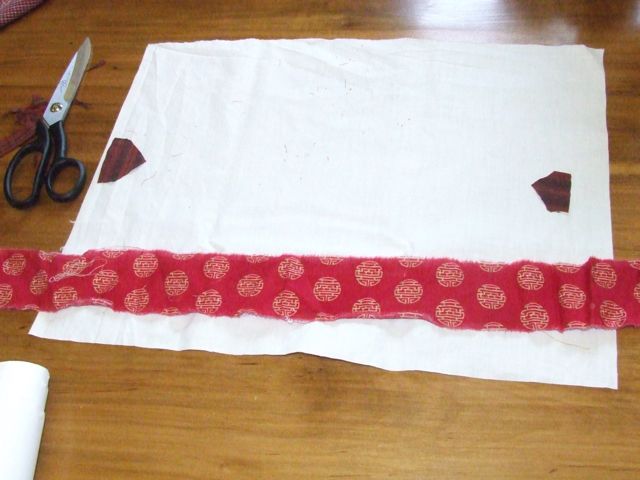
2. Using the fabric scraps and a pair of scissors, create a design by placing various scraps on your base fabric. You can reshape the scraps or leave them “as is” and just place as you like on your base fabric. The point: Be creative, do what YOU like, this is YOUR placemat.
This is the first of the Boy’s designs.

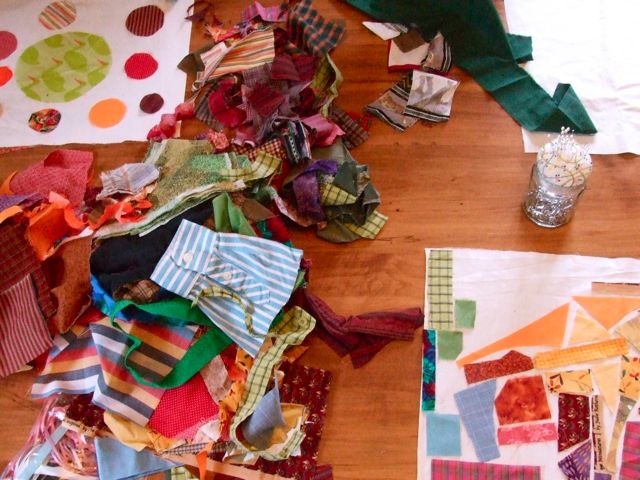
Here’s what our dining room table looked like. The floor was a mess but that’s to be expected.
3. Note: The kid friendly part of this activity is over. The rest should be done by you. Following the directions on your fusible web, use it to adhere the fabric scraps to your base fabric. If you’re still not sure about using fusible web, here is a good fusible web tutorial link.
Here’s what our placemats looked like once they were fused. Notice that some of the larger pieces were pinned in place. That was just my preference, feel free to fuse all pieces.
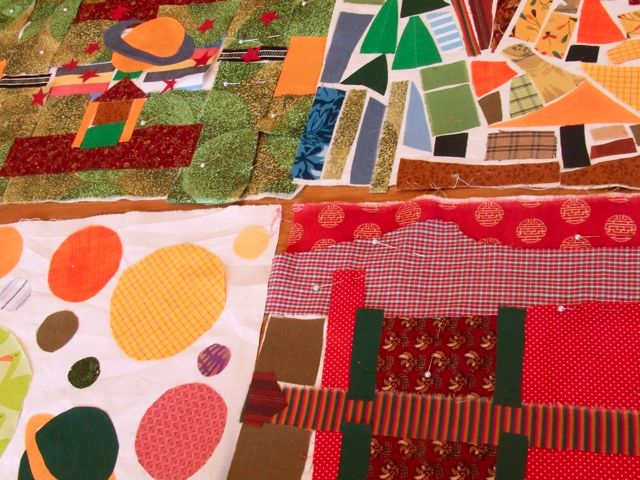
4. Now you will make a quilt sandwich. Place a piece of batting between your designed top piece and your back piece. Pin the sandwich together. Do this for all your placemats.
5. Free-motion quilt all your placemats. I’m still learning how to do this so my work is FAR from perfect. But I can tell you that if you have a regular old sewing machine like I do, you will need a darning foot to do this step. You also need to put your feed-dogs down (those are the little toothed pieces under your sewing-machine needle that feed the fabric along as you sew).
Note: The finished design has raw edges. The edges will likely soften and lose threads over time with washing. Once they completely fall apart, we will make more.
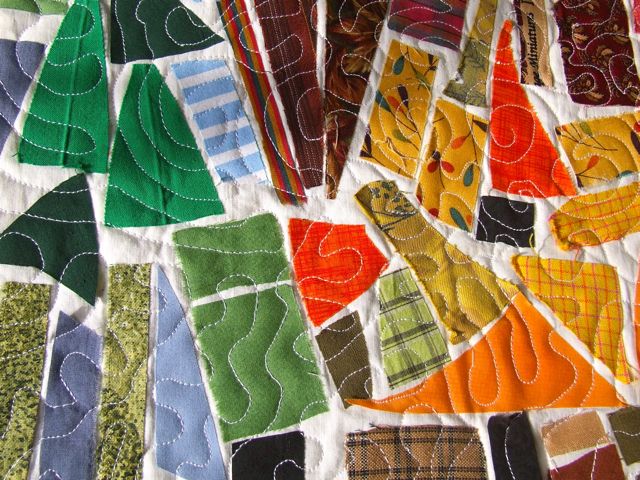
Here are a few details of the free-motion quilting…

6. Bind your placemats. Here is a very good tutorial at Sew Inspired that shows you how to do that.
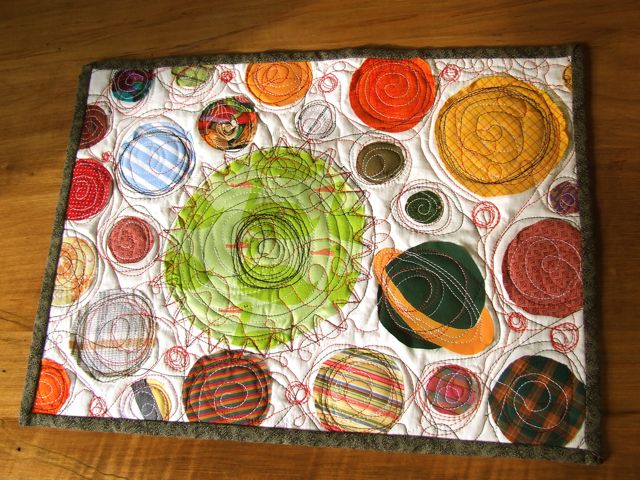
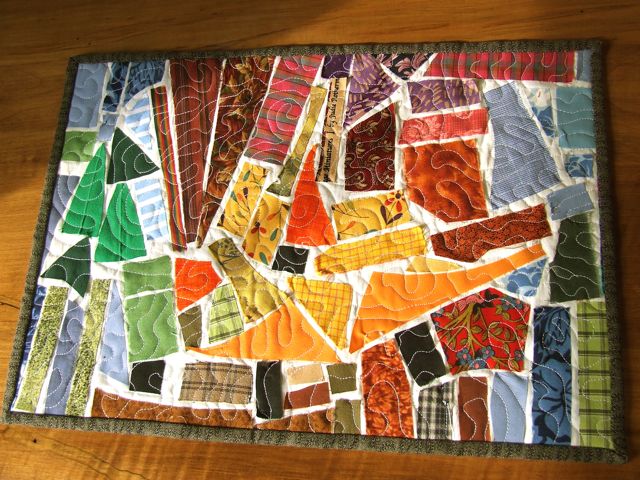
And here are the finished placemats! Here is Lo’s which I just love! I’m super-fond of circles.
Here’s the Boy’s first design…
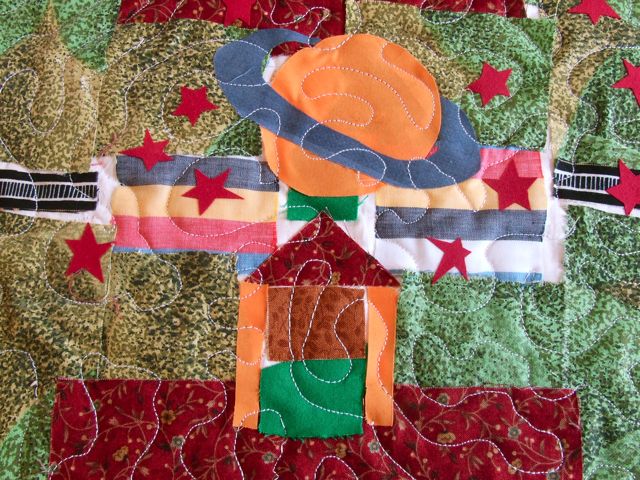
Here’s the Boy’s second design. I love this one too. I like the way Saturn is about to collide into our house. So great. The stars are very cute too.

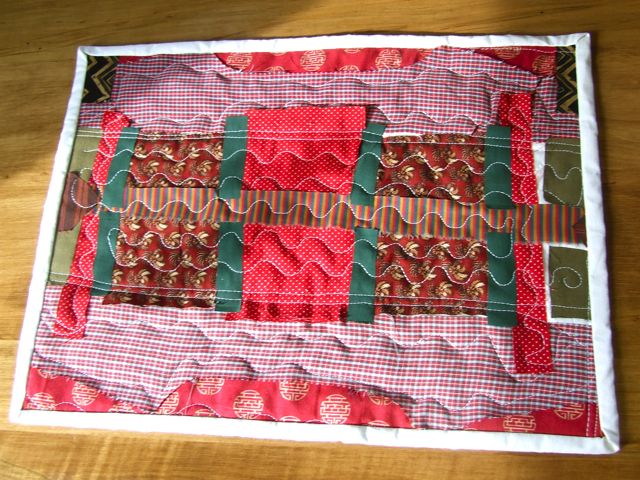
And here’s my design!
We had a great time doing this together as a family. Perhaps you will too…
Have a wonderful day!
They are so fantastic!!! Gotta keep this one up my sleeve for sure. Thanks for the great idea (I love Lo's, too and the way you quilted it is amazing).
Sew gorgeous. Can't believe you got !boys! to make these with you! All so pretty, and a super clear tute. Your boys are very artistic.
waooooooo…this is great recycling idea also…i love this idea…i am not so well in stitching but i think i can easily try this…hopefully…again its awesome…thanks for sharing dear…
This is amazing and beautiful! Fantastic work!
I love it!!! Great project to use up those scraps!
Now thats what I call a crafty day well spent!
Looks like you all had a lot of fun. Love the freemotion quilting!!
Awesome placemats – they would make great Christmas gifts!
I love all the designs – how very creative of all of you. I am going to have to get myself a darning foot.
Michelle, looks like you've competition in the design end of things :*)
Love each of these wondrous placemats.
I know you all will enjoy each time they are put on the table.
Hug,
Gerry
Very cute and creative!
Michele you do most gorgeous things. I love these little quilts. They would be good for machine quilting projects – Thanks for sharing – Hugs Nat
Oh my goodness, what a amazing clever idea. I have 8 nieces and nephews, this would be great for them Thank you so much for sharing:)
Ann Flowers
flowerscrazyq@gmail.com
You're so talented!
This week is my blog anniversary and I'm hosting a week's worth of great giveaways. Feel free to stop by if you'd like!
Great that the boys got involved voluntarily:) Well done you. And bet they are secretly quite proud of their finished placemats. Very cool. Ciao
This is a great idea. Thanks for sharing. It could be a good Xmas present for grandma and grandpa. I will try it with the kids.
Hugs Ulrike
Lovely , you certainly had a great time ! That's a nice project !!! ( Thank you for the different links and explanations , that's very thoughtful too , all my questions were answered )
Oh Michele, what a wonderful craft to do with the kidos. The placemats turned out fabulous! Your free hand stitches are lovely, especially the circles. I LOVE THIS POST!
These are gorgeous, and how fun to do with family! 🙂
Eeek~ I love this! Your placemats are truly spooktacular!
What a GREAT idea!
These turned out so cute! And they can use them over and over. I love it! Thanks so much for linking up to Handmade Tuesdays @ Ladybug Blessings!! Make sure to come link up next Tuesday! P.s. let me know if you ever want to feature a tutorial!
Wow, I'm impressed. What a cute project this is, you did great with your quilting technique.
Ooo, how I love these. What fun. Somehow nearly all of your sewing projects, especially this one, remind me of Eric Carle illustrations….they are so colorful and free form. I know you must have taken your time with the composition, but they come out so lively and happy like 🙂 Love it!
How cute! It's so nice that you worked together to create something for all of you to enjoy. I need to learn how to do that free motion quilting. It's so pretty!
This is a great way to involve the kids, and get rid of scraps…both of which I love!! Thanks for sharing!
Oh wow! These are wonderful! I love that it's a project for both you and your children. What a great way to get them involved in sewing! My little one loves to help me when I'm placing pieces of fabric down for quilts and I know that she'd love doing these, especially since she'll be designing her own placemat! Thanks so much for sharing this! 🙂
I love this. Both for the family fun it provided and how great they look. My favourite it definitely Lo's. Loving the solar system look. And yeah, I have a thing for circles too!
What a fabulous idea! I love it! Thanks for sharing.
Oh, I love these!
This are awesome… original and fun and you did a great job explaining the project. Thanks so much for joining us at A Crafty Soiree xoxo Malia
love these!
This is such a cute idea!! I love how they turned out too!!
I really like the circles too !
These are spectacular! I think I am going to make some pillow covers using this same concept – they are so bright and cheery. Thanks!
Lindsay
I really like this idea. I too have boys and I am always looking for boy-friendly things to do. I think this is great and a super way to use up scraps!
Thanks!
What a great project! My son would love this. I have a question though. Did you painstakingly cut out pieces of fusible webbing for each scrap in order to fuse it to it, or do you have a short cut that I'm not thinking of right now??
ps … love the spelling of your name ;o)
-Michele
butler (dot) michele (at) yahoo (d0t) com
Hi Michele Butler!
What we did was choose all the scraps that we wanted to use and then placed them side by each (as close as possible) on the ironing board, placed the fusible web on top and then ironed them in a group, many pieces at a time! hope this helps! thanks for the lovely comments.
M
Hey Michele!
I made some pillow covers, very much inspired by your post here – love it!
Come check it out if you get the chance:
http://craftyladylindsay.blogspot.com/2011/01/shabby-chic-patchwork-throw-pillow.html
and feel free to grab a featured button from my sidebar if you want:)
Thanks!
Lindsay @ Diary of a Crafty Lady
Those are wonderful! I'm really in love with circles and the circles mat is my personal favorite. Isn't it something having a crafty boy? My 7 year old loves to make things. My 12 year old daughter is interested for about 15 minutes or so and then wanders off. You've got a talented one there! Hope he keeps the crafting bug for a long long time!
I too really love the way you quilted Lo's placemat. They are all great! I should try this with the kiddos sometime but I would have a hard time keeping them all tame and occupied while fusing all those pieces.
These are truly beautiful and one of a kind! Very, Very, Very Cool! xxx