Well we’re still struggling through sickness over here. Yippee. We’re partaking of the fluids, and getting of the rest. I did manage to put together a little tutorial for today, which is good though, right?
So, I’d like to welcome you to Series 3 – SITUATION CHRISTMAS ORNAMENT-ATION #2! The link to Installment #1 is here just in case you’re curious or need to relive the past.
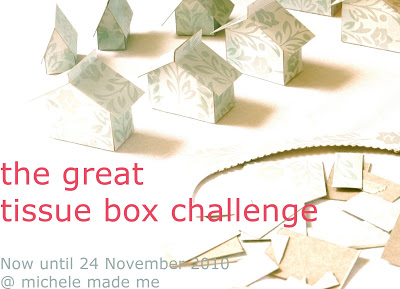
And speaking of reliving the past… If you think these ornaments are familiar, well you are right. In fact they are made in exactly the same way as these little tissue box house ornaments, using the very same house template and construction techniques.
Shall we elaborate?
Tutorial: Greenhouse Christmas Ornaments
1. You will need:
- Some source of clear, flat plastic. I used the box from a drapery rod set which I bought a couple of years ago. Yep, I’m a hoarder. It’s amazing how many things you can make with ONE of these boxes!
- Gold cord and large needle
- Good quality packing take. I use the space-aged Canada Post brand. It’s crazy-sticky! And no, I do not work for Canada Post.
- Gold dimensional paint
- Small silk or dried flowers. Mine were thrifted for pennies.
- Exacto knife
- Fine marker
- Ruler
Note: You really want to start with super-clean hands so that you don’t leave fingerprints everywhere on your plastic… But you knew that… Wasn’t necessary to tell you… I apologize…
2. With the house template on your piece of plastic, place dots at every inner and outer corner of your template using a marker.
3. Remove the template. Join the dots on the plastic with your exacto knife and a ruler.
4. Cut out all the pieces for the plastic house.
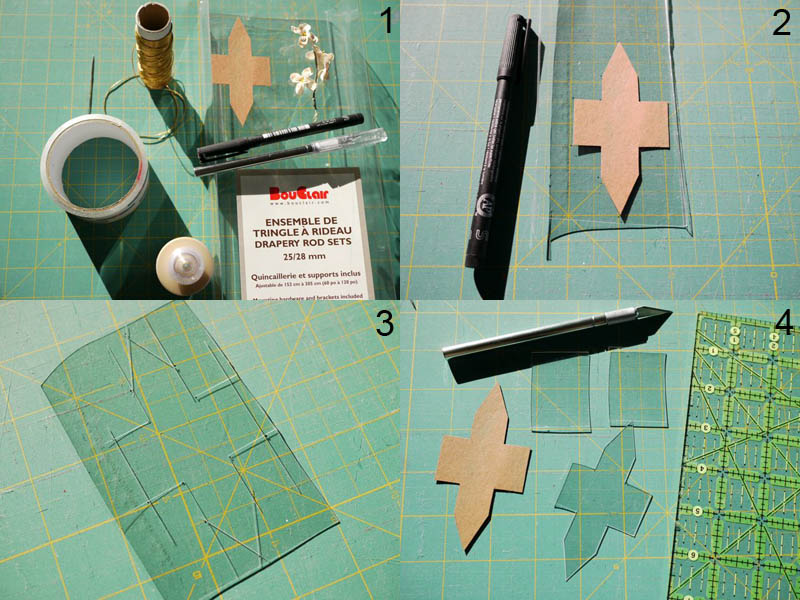
5. Using your exacto knife, score the cutout along the fold lines indicated on the template.
6. Fold the house parts along the fold lines.
7. Now here’s my BIG secret for buiding these houses… I use packing tape. Gasp.
8. So tape em’ up!

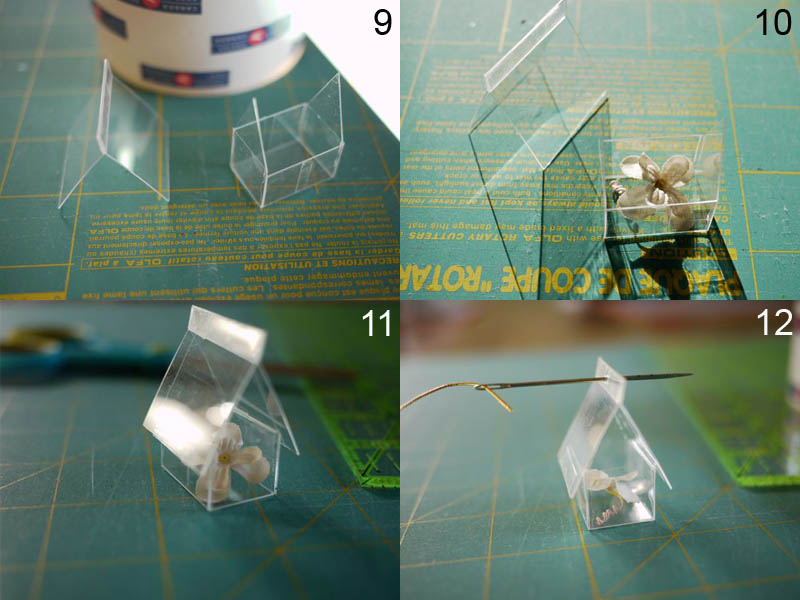
9. Keep taping…
10. Throw in some flowers! It is a greenhouse after all.
11. Close it up. Yep, with the tape.
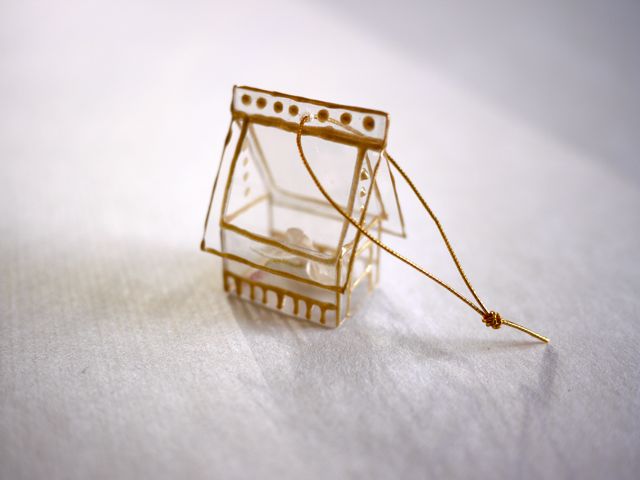
12. Add a hanger with your needle and gold cord.
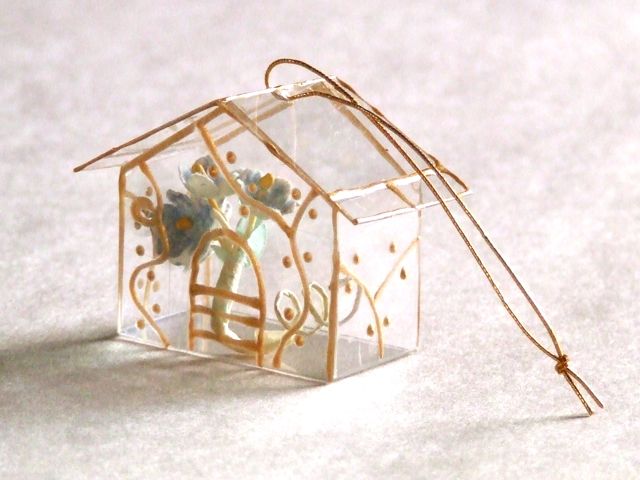
It’s essentially complete. All you have to do now is take some of that dimensional paint and pretty it up!
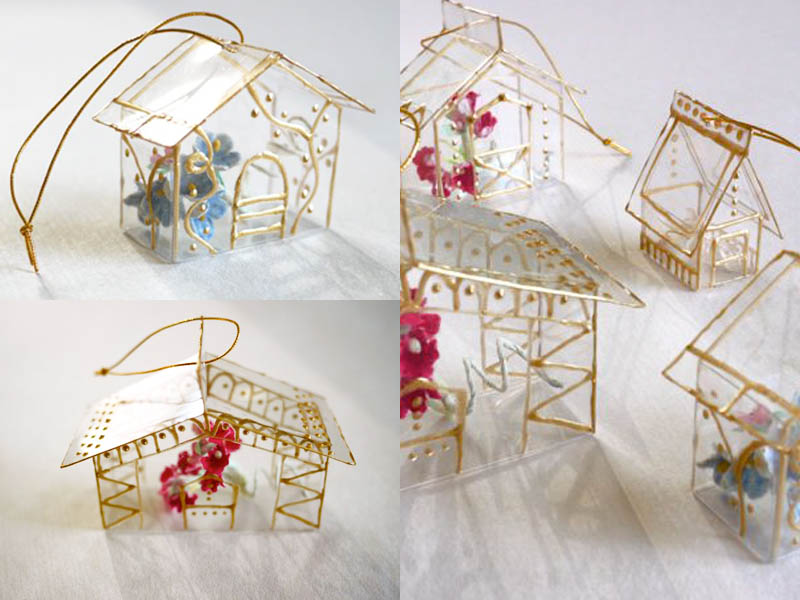
So here are my completed little greenhouses…

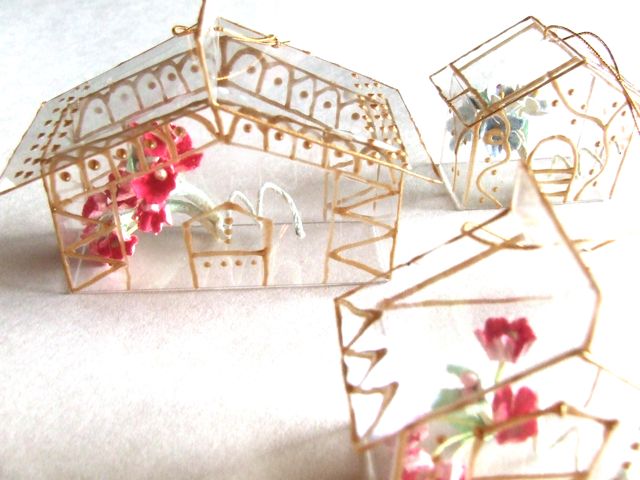
Why don’t you have a go? Make one for a gardening friend. Use it to decorate a gift. Or hang one in the tree… So many possibilities!
And whilst you’re here, check this out:
Now you go have yourself a fantastic day!
OK, those are pretty darn sweet! I thought I was done crazy tiny houses but I may have to try these.
These are really creative — I actually thought, at first, that you created these with metal filigree!
A very brave project, but spectacular
These are gorgeous!!! I love them. So creative!!!
So pretty Michele! with the gold details and the little flowers! my daughter would love these! I must try these with her…
WOW! These are gorgeous! I feel like mine would be an exercise in fingerprinting and dog hair. I may have to try them anyway!
You are amazing…
So cute…love them but flowers still calling hehe
glad you like what l'v done with your idea
Got interrupted yesterday so didn't get as many done as l wanted…making wreath with them 1st l think..thanks for the fun
Hugs Suz x
ps l'd love to be included in your post thanks xx
C 'est très joli en transparent !!! J 'ai failli y penser , si , si !!! And of course , with transparent tape , it seems so obvious 😉 I'll say that your "dimensional paint " makes all the difference ! Do you imagine in my village here there is anyway I can find something like that ?? Alas , I will have to figure out something else ….
Awesome!
Get all better soon! xo
These are really cool. I like seeing new craft ideas, thanks for sharing!
Now that is what I call resourceful, how adorable!
These are so pretty! Love them!
Just too enticing…
Michele! The flowers inside! The gold paint! The clear packing tape! These are KILLING me with their loveliness. Please keep getting better. if this is what you come up with while laid low, none of the rest of us have a chance. I think you may win the internet.
i love your blog and your tutorials! i follow you forever…
Those ornaments are so beautiful and whimsical! I love them!
Oh, they are sooooo cute! Love them!
I love your adorable ornaments!!! I had to share on my blog, hope you don't mind. 😉 http://junkmailgemsblog.blogspot.com/2010/11/diy-recycled-ornaments-from-michele.html
Those are very sweet! I linked on the Dollar Store Crafts facebook page. http://www.facebook.com/pages/Dollar-Store-Crafts/161233564682
You know I have seen so many hand made ornaments (reading what seems like a million blogs to ignite my tired creative juices and give me the courage to start my own creative blog) but, I must say this is one of the most creative handmade ornaments I have seen yet! It definetly looks like something bought in a fancy store for way too money. They are beautiful, so simple and so many options as to what a person wants to put inside or outside for that matter. Fantastic job, I'm going to HAVE to find the time (between my renovations) to make this with my daughters for this holiday season. Guess I'll be reading 1 million and 1 blogs for my creative jump starts! Thanks
I love this! They are just beautiful!
Rebecca@RootsAndWingsCo
These are amazing, they look like the delicate glass votive holders that I remember from Pier One ages ago. Can't wait to see the rest of your tutorials.
I'm always amazed by your creativity and originality ! This is such a fab idea.
Soo pretty! I've been making little houses out of cereal boxes. I must say I like these a lot more! I just bought a curtain rod set, now where is that darn box….
Kathy
wow! I knew I was saving those plastic boxes for something! These are super wonderful and I'm so proud to be a witness to your unbounding creativity! Thanks so much for sharing on craft Schooling Sunday, great to see you as always! xoxoxo Sara
Hi this is my first visit to your blog, and I love these little houses! I need a template for the house. I must have missed it somewhere???
And im not very good at free hand drawing…it would look like who knows what if I tried to draw it myself. LOL Great job! I will be here all morning looking at your blog.
Well ok I did over look the link for the house template. DUH! I guess it was too early and only had my first cup of coffee…. Thanks for the neat projects..
Bridget
Great!
wow oh wow!! these are adorable!!
It's so poetic!!!!!!!!!!!!
lovely 🙂
OmGosh, these are absolutely adoreable! I'm definitely going to be making some of these. Thanks for sharing your creativity.