But enough about me.
A little while ago I decided it was time to open up this blog and expose it to some fresh inspiration. To that end, on the 1st and 3rd Thursdays of each month, through a new feature I’m calling “You Guest It“, I intend to let someone completely different take the reins for a change. Exciting, eh? Kicking the whole thing off today is Michelle – note the completely different spelling – who is the force behind Falafel and The Bee. Ready! Set! Go Michelle!
First, I would like to thank Michele for having me guest post today. Besides having a very cool name *grin*, she has a great blog with really fantastic ideas {as you all must know}. It is an honor to {virtually} be here today.
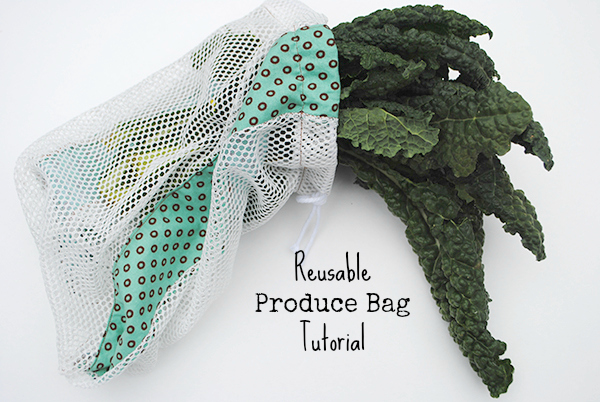
Today I am sharing a tutorial to make your own Reusable Produce Bags!
I am going to share two different ways of doing these. It is an extremely flexible project, so ultimately you can customize these any way you’d like!
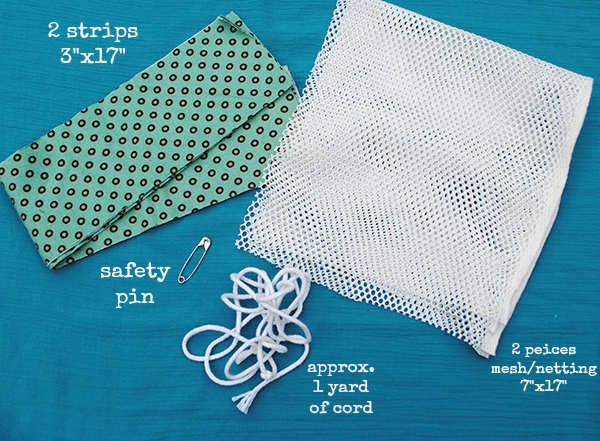
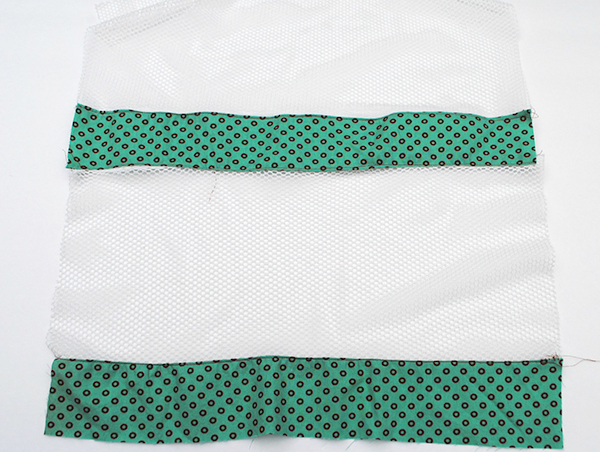
- 2 strips of fun cotton fabric {3″x17″}
- 2 pieces of mesh {7″x17″} *I bought my mesh at the fabric store, but if you can find some thrifting, more power to you!
- Approx. 1 yard of cording
- 1 safety pin
- Also needed {not pictured} sewing machine and scissors
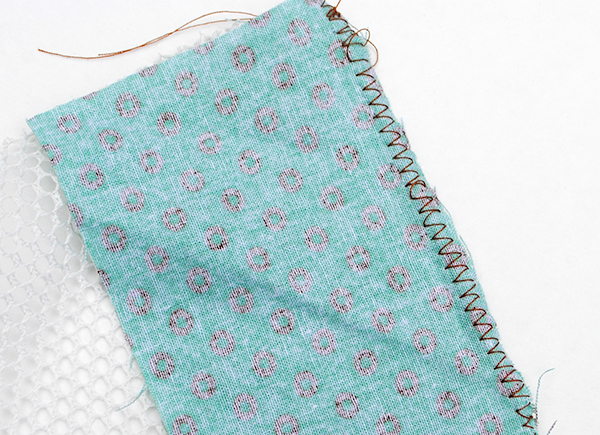
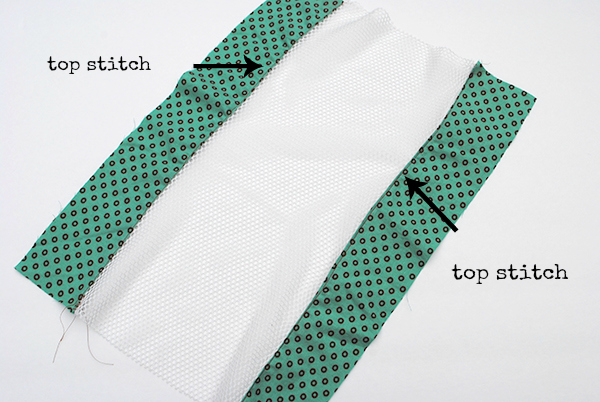
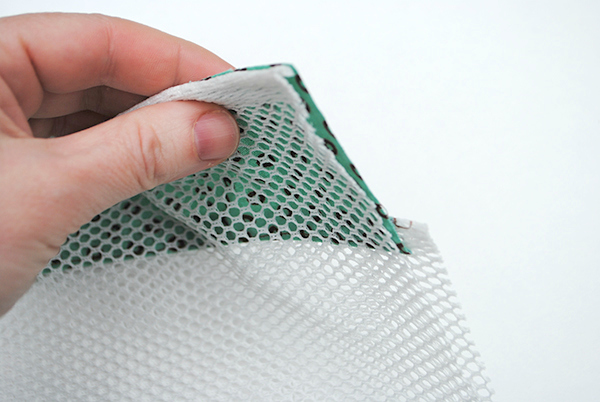
Repeat for the other side. Open up your strips and topstitch. Make sure you fold the sewn edge on the underside towards the cotton fabric strip.
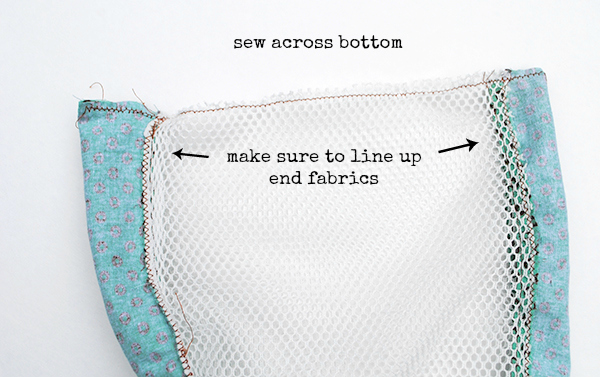 Sew across the bottom. Make sure you line up the fabric sides front and back.
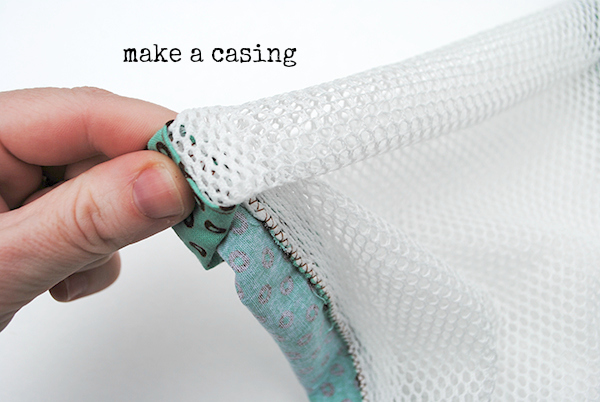 Make a casing on the top of your bag by folding the fabric over twice.
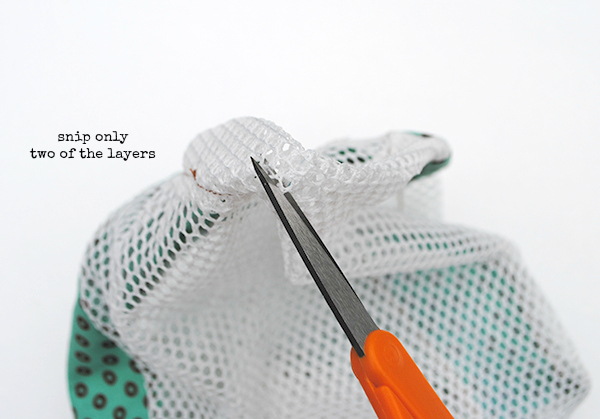 This part is a bit tricky… but I know you can do it! Snip, with small scissors, a small hole in the middle of the mesh part of the casing to make a place for the cord to go through. You will cut through two layers. Make sure not to go through all of them!
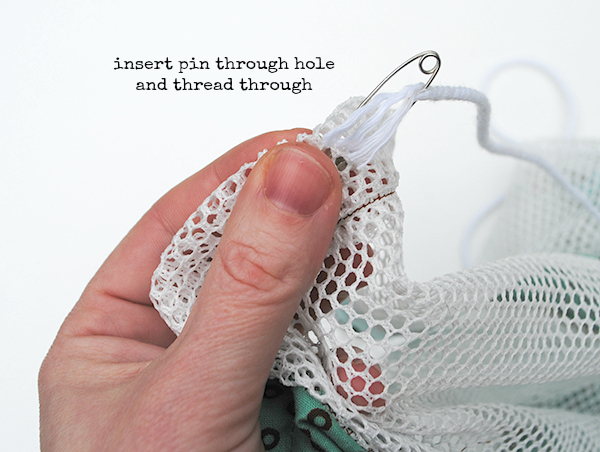 Take your safety pin and cord. Attach the pin to the end of the cord. Thread through the hole and then back around through the other side.
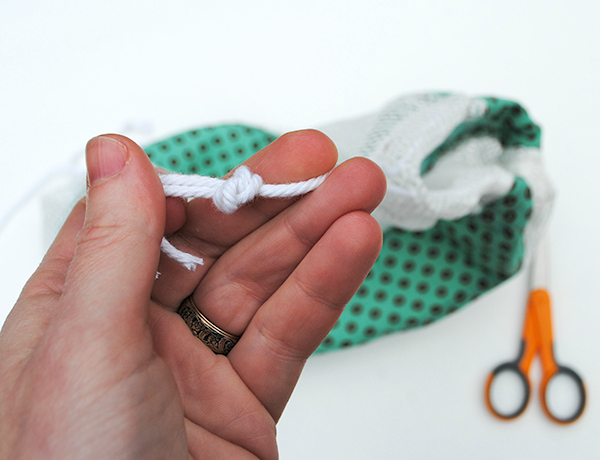 Tie a knot with the ends of the cord. And you are done!
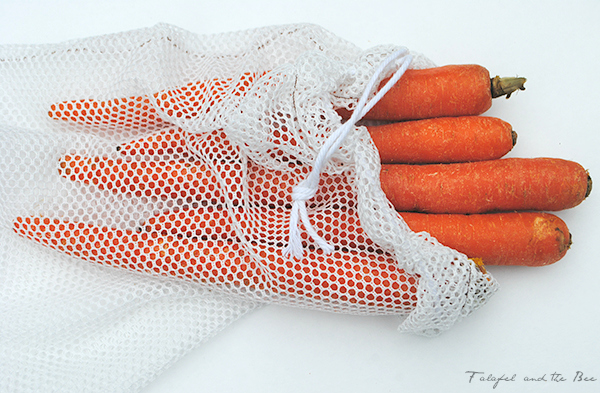
 Insert some produce!
The other method I would like to share uses just two pieces of mesh. I cut them a little larger (10″x17″). Only sew one side completely, and the other side, leave an opening about 2″ down from the top.
 Now you won’t have to cut a hole to thread your cord. Just follow the steps above (starting with sewing up the bottom and then making a casing). *Notice that I used brown thread so you can see it, but you can use white so it won’t be seen.
 Insert more produce!
I hope you enjoyed my tutorial. Thanks for having me, Michele!
I would encourage you to make a few of these and use them instead of plastic bags whenever you go out shopping. They’re pretty, lightweight, sturdy, washable, easy to tuck into a pocket or purse, and best of all, reusable! Thank you Michelle for this lovely and useful tutorial!
Find out more about Michelle on her blog Falafel and The Bee. In a very authentic voice, she shares daily about the moments that make up her life. You’ll find book reviews, photography, personal stories, gluten-free recipes, sewing projects and all kinds of other crafts. She mentioned that she’s especially proud of some of her wood-working projects. Case in point, her farmhouse table. (I’m SO impressed by this table Michelle, I would be beaming with pride over it too!) And if you love cute kids as much as I do, Michelle has two totally gorgeous children pseudonymed Falafel and The Bee who are the shining stars of her blog. See? It all makes sense! A few of my favourite Falafel and The Bee posts include:
- the family’s traditional fabric birthday crowns
- Falafel’s delightful jammies
- my kind of snack – no cooking needed!
- this heartwarming post about simple life things
- this wooden computer desk
- this sweet Valentine salt-dough craft
That should keep you busy for a wee while, eh? Go on now, have fun exploring! And Michelle, it was a pleasure sharing this space with you today. Thank you so much for being here!
P.S. Have an idea for an eco-craft? Seeking a new audience? Consider submitting a guest-post idea to Michele Made Me’s “You Guest It”! Check out the details HERE.
happy to make acquaintance with a creative blogger like Michelle!!!
thank you Michele, xxx Ale
How exciting! Loved the tutorial!!
I've long wanted to make something like this–thanks for figuring it out and sharing with us!
Thank you! Thank you! Thank you MicheLLe! I have been wanting to make and use reusable produce bags for some time and I know i could most likely cobble something together on my own – but your tutorial is going to make the process so much easier! The result so much prettier! And having this well done tutorial at my fingertips is going to make it much more probable that I will actually move beyond thinking about it!
And MicheLe! What a great idea to add guest posts to your blog. What fun to look forward to not to mention meeting new people!!!
These look simple and practical- what a great tutorial! Thanks so much for sharing! I will have to go check out Falafel and The Bee!