Welcome to My Tiny Brain Wave #2!
If you recall, this is a feature wherein, every now
and again, intermittently and periodically, but most probably rarely, I will be posting ideas that I’ve come up with that are NOT A CRAFT (gasp and double gasp) but rather a genius idea that might help with crafting in some way. Right.
Today I will show you the jig I made for quickly marking cutting lines on a ton of cylinders. It’s super-simple and a huge time-saver.
What motivated this Tiny Brain Wave?
The boy and I are working on our Advent Calendar! (We’re not quite done yet, yikes. That’s okay, remain calm, we have until tomorrow. No problemo.) And the calendar, like most crafty things around here, is made of recyclables. In this case, concentrated fruit juice containers.
BUT, the design in my head requires that we cut up the juice containers into shallow little bowls that will eventually hold the goodies.
This is where the Tiny Brain Wave comes in.
I didn’t want to have to mark out every cylinder. Multiple times. With a ruler. At several points. Around each cylinder. Joining the marks. To create the cutting lines. What a hassle that would have been. Ugh.
So double-quick, I created a jig to do the marking and measuring for me. Joy!
Requirements for the jig:
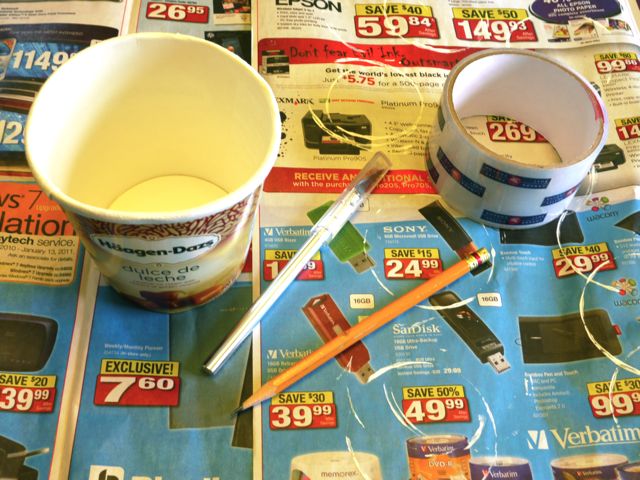
1. Small container a bit wider than the cylinders (juice containers) you are marking
2. Exacto knife
3. Sticky tape
4. Pencil
2. Exacto knife
3. Sticky tape
4. Pencil
 Decide how tall you want your cuts to be on your cylinders (or juice containers) and mark the outside of your jig container at that height. My “mark” is the center of my little circle
Note: Be aware that the inside bottom surface of the jig container will be higher than the outside bottom surface. Keep that in mind when you are measuring for height.
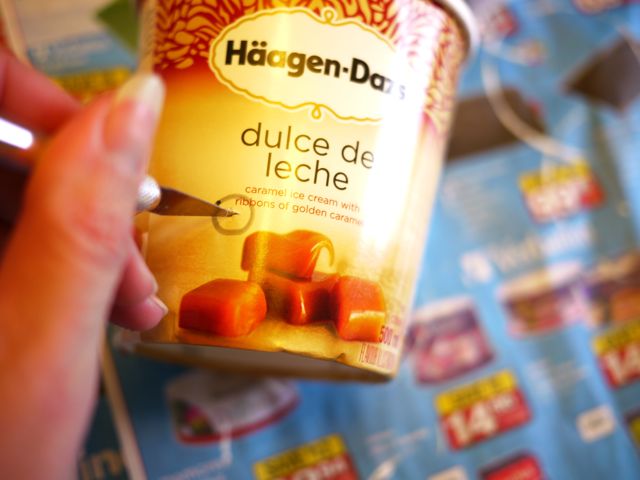 With your Exacto knife, cut a little ‘X’ at your mark.
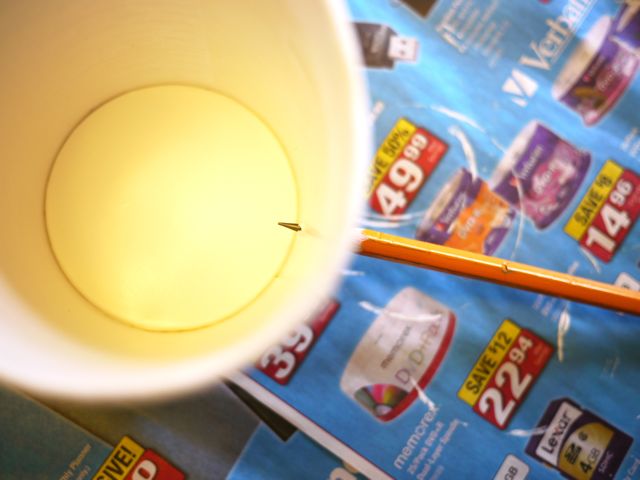
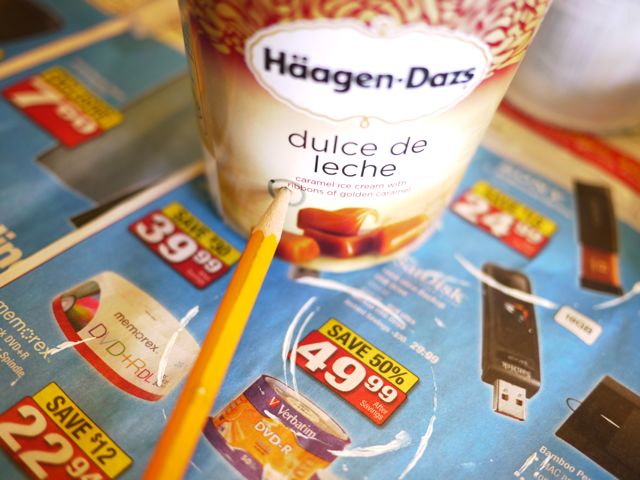 Push the tip of your pencil through the ‘X’.
Put a piece of tape on the eraser-end of the pencil, adhering the pencil to the work surface and preventing it from moving around.
 Your jig is DONE! This is what it looks like on the inside of the jig. Yes, a pencil point sticking out. Or in, as the case may be.
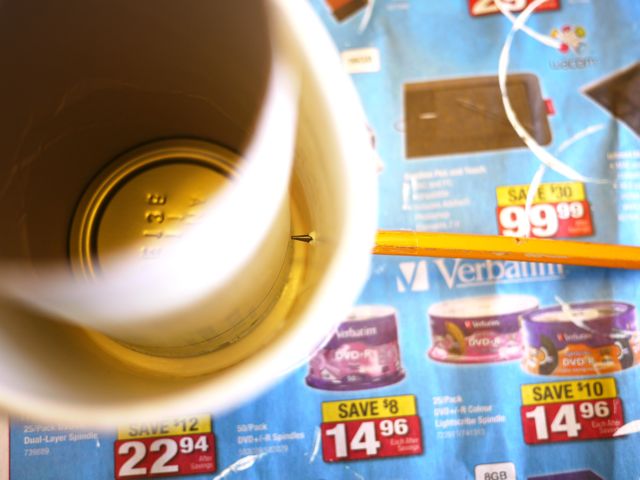 Now place your cylinder/juice container inside the jig and gently TURN IT against the pencil point until it is marked all the way around.
Do the same for all your cylinders/juice containers)…
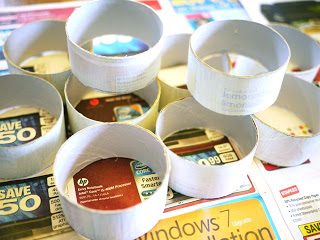
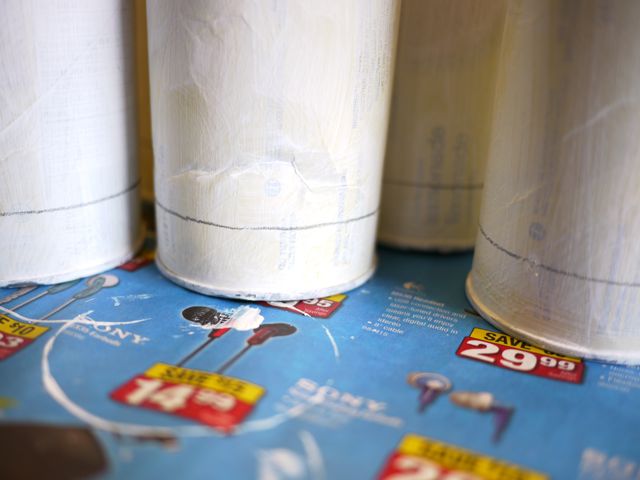 They will look like this. Now cut off these bottom bowls with your Exacto knife. And, with the jig, mark the remaining parts of the cylinders again. And again. And again…
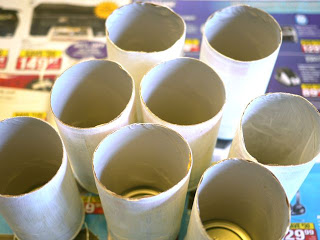
 Until you get a ton of little cylinders!
So that’s it. This jig was really helpful to me so I thought I’d share it. Maybe you’ll need it someday, you never know, and here it will be waiting!
Now you go have yourself a fine day!
Oh, JEEZ LOUISE! (May I call you Louise?) That right there is about the cleverest brainwave I have ever seen! YOU are a PHENOM.
Ingenious. I hope you are patenting your ideas!!!
Brilliant!! I needed this the other day! I'll definitely remember for the future. 🙂
That's amazing! I've always had a hard time with that. Thanks for the tip.
What a clever idea.
A x
Good idea! I look forward to seeing the completed advent calendar.
Kathy
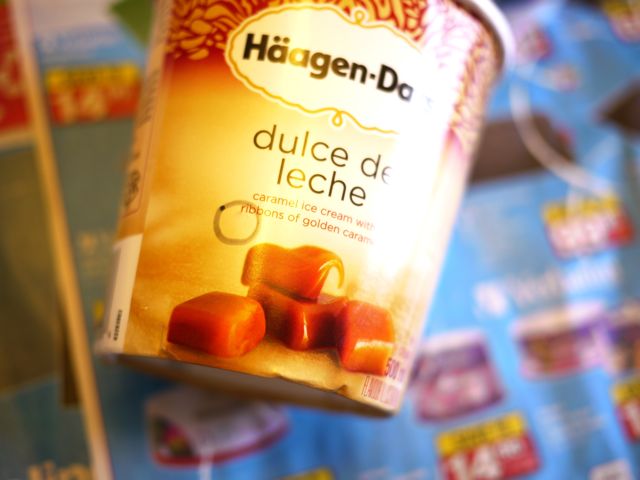
Brilliant! I guess I need to run right out and grab some Haagen Daz!
You're a genius!
Some day (in the very far off future) someone will preserve your brain is a recycled container and label it "crafty genius".
Very clever, I must start using more kleenexes and drinking more concentrated juice. Then maybe I could try out more of your brilliant projects.
Seriously brilliant!!
Óptima idéia!!!!!!
hugs de Maria Filomena
You have such great ideas!!!
Can't wait to see the reveal!
GENIUS MUCH?!
Great idea Michele!!!
Oh, that´s an amazing idea!!!
Brilliant idea Michele! Thank you for sharing all these really nifty little helpful ideas 🙂
Oh, thank you, thank you!
I have the same problem with paper roll tubes I have been gathering to make napkin rings but really didn't want to do all that measuring and marking and the tubes are really starting to overflow. Now I have no excuse for not making the napkin rings.
Hello, are really beautiful! I'm Italian, but I don't konw what is the jig? Where can I find? Serves to smooth the cut?
Thanks Laura
Hi Laura, the Jig is the cylinder with the pencil pushed in a little hole on the side. The jig is simply used to quickly mark a cutting line on the juice container so you don't have to measure.
Hello, You made me gasp when I finally saw where that tutorial was going. How scathingly brilliant, and simple. Thanks.
Love your ice cream choice also.
Pure genius, Michele!!!
Absolutely brilliant – clever and practical and saves time:)