
Welcome to Series 3: SITUATION CHRISTMAS ORNAMENT-ATION #3!
Hopefully you’ve figured out that this is a series of Christmas ornament/decorations all made with things from your recycling bin. Let us begin by doing a little review of where we’ve been so far.
Well, first off we made these simple yet pretty Plastic Bottle Ornaments. And then we went a little tropical with these floralized Greenhouse Ornaments. And that’s brings us to today! Also, no one knows yet exactly how many installments there’ll be in this little series. But I’m going to keep it exciting and say that I haven’t decided yet. I like to play it by ear and make it up as I go along… And the fact of the matter is, well… I just don’t know yet.
Now hopefully you will bear with me as I make a severe hair-pin turn right back to the plastic bottle. The thing is, you see, I had all these plastic bottle scraps leftover from my recent crafting adventures so I decided that maybe I could use them up before I move on to something new. So here’s what I came up with…
Are you ready! Let’s get to it!
Tutorial: Plastic Bottle Christmas Tree
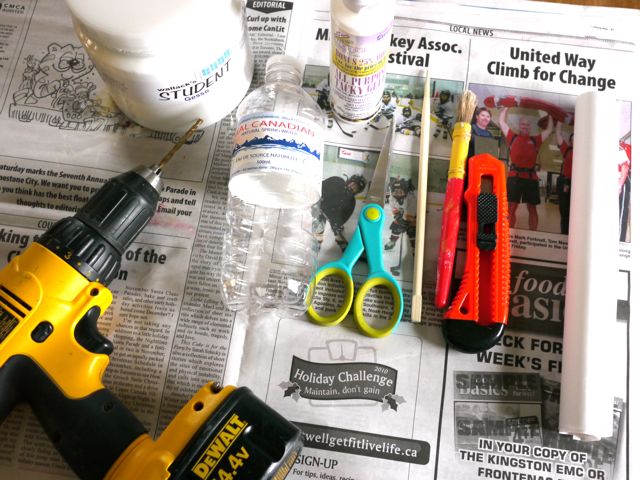
You will need:
- Several plastic bottles and three caps
- Paint and paintbrush
- A chopstick
- One 8 1/2″ x 11″ sheet of paper
- Glue
- Exacto knife
- A pair of scissors
- Drill with bit the same diameter as your chopstick or slightly smaller
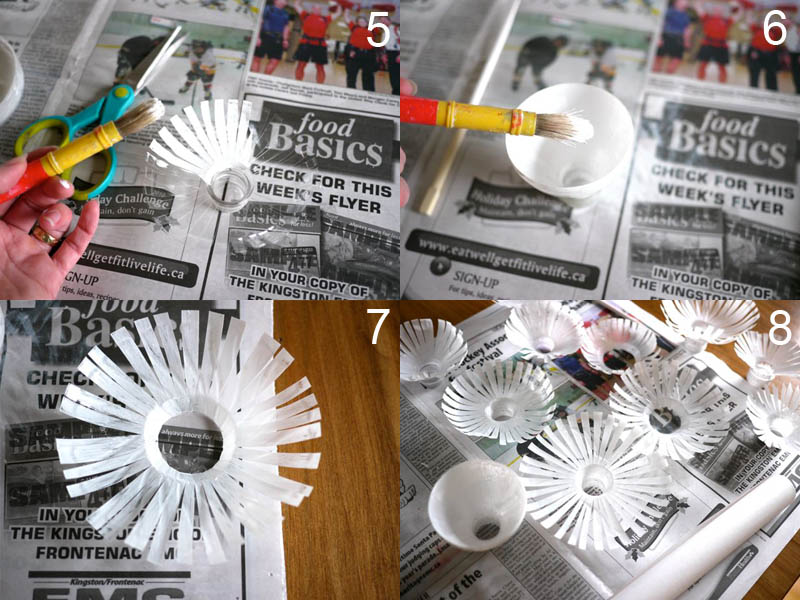
1. Using an exacto knife, cut the top section off your bottle.
2. Clean the edge with a pair of scissors to make the cut nice and clean.
3. Now cut your top as shown in #3, creating several “leaves”.
4. Using your fingers, bend the leaves back to open them up.

5. Paint your top white (or whatever colour you want your tree to be). Repeat steps 1 through 5 for several top sections. I did this with 7 tops. This number may differ depending on the types of bottles you are using.
6. One of your bottle tops will serve as the base and should be left as is without leaves. Paint it.
7. Remove the threaded cap section only from two bottle tops. From these two bottle tops, cut the leaves as for the other tops. These will be used as filler leaves. Paint these as well.
8. Let all the pieces dry. Take your 8 1/2″ x 11″ sheet of paper and roll it into a tube along its 11″ length.
9. Roll it up small enough to tuck it into the base bottle top creating a trunk.
10. Now slip on the piece with the largest leaves.
11. Slip on 6 of the remaining leaves from largest to smallest using the filler pieces where you think they work best, and adding more if you like. Note: I used a variety of bottles in different sizes. These naturally gave me leaves of varying sizes which I then placed on my “trunk” from largest to smallest.
12. Paint your chopstick the same colour as your tree.
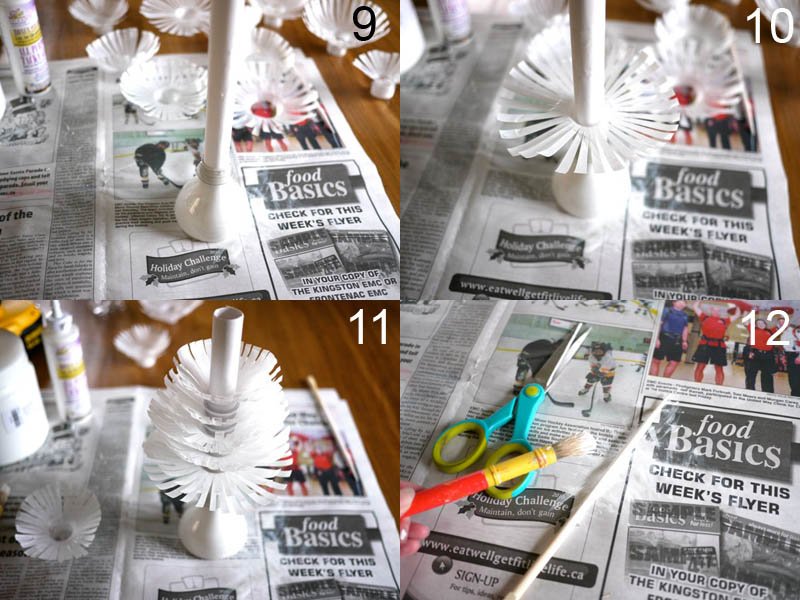
13. Take one of the remaining tops with leaves and put the cap back on it.
14. Use a drill to drill a hole in the cap.
15. The hole should be the same diameter as your chopstick or slightly smaller.
16. Stick the chopstick in the hole as in #16 with leaves pointing down.
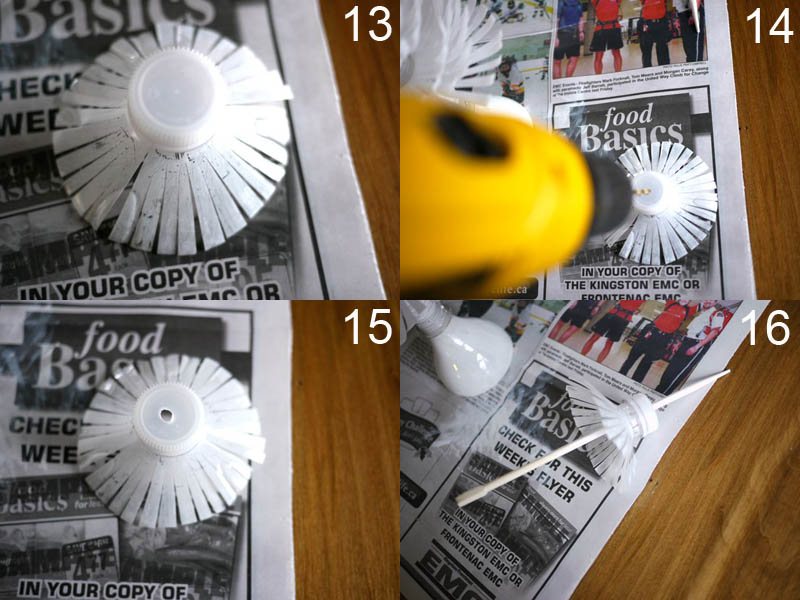
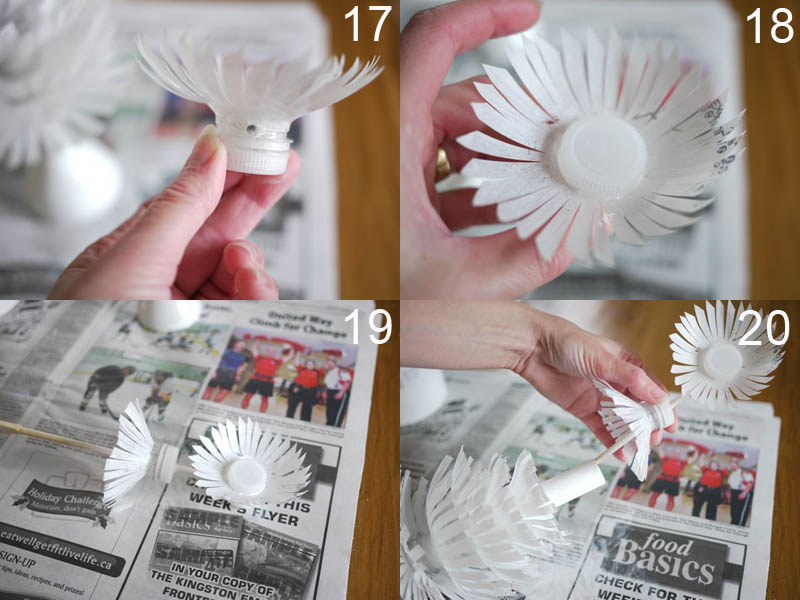
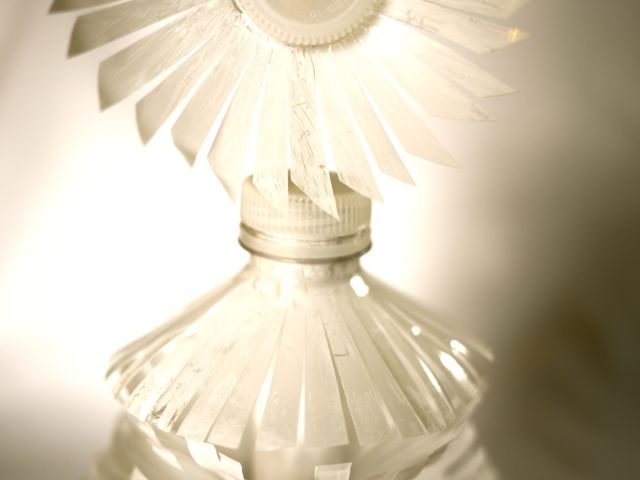
17. Take the last remaining bottle top with leaves and drill holes through the sides of the threaded part. Place the cap back on.
18. Glue on a second cap in the centre of the leaves, so it has 2 caps, one in front, one in back.
19. Push the end of the chopstick through the holes in the sides of this piece.
20. Place the chopstick end into the trunk and slide the whole thing down until the cap sits snuggly on top of the trunk. You may have to trim your trunk to make all pieces fit nicely.
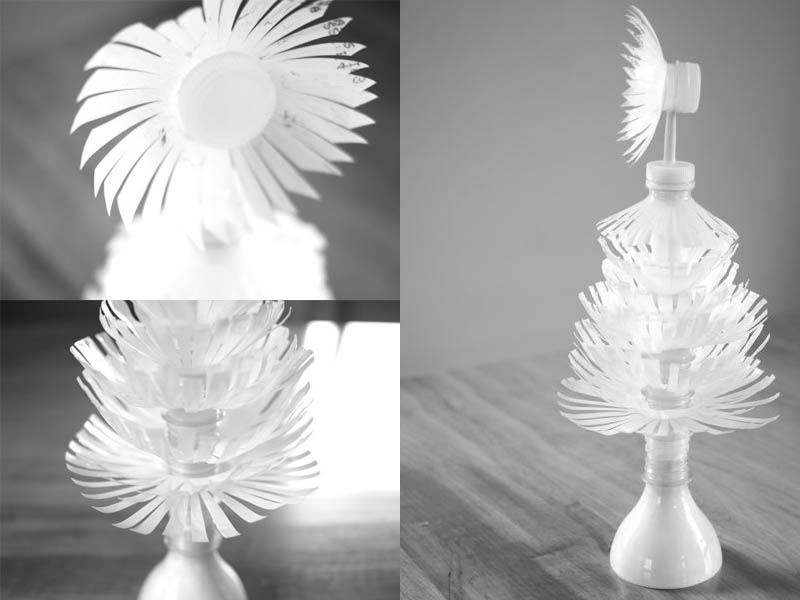
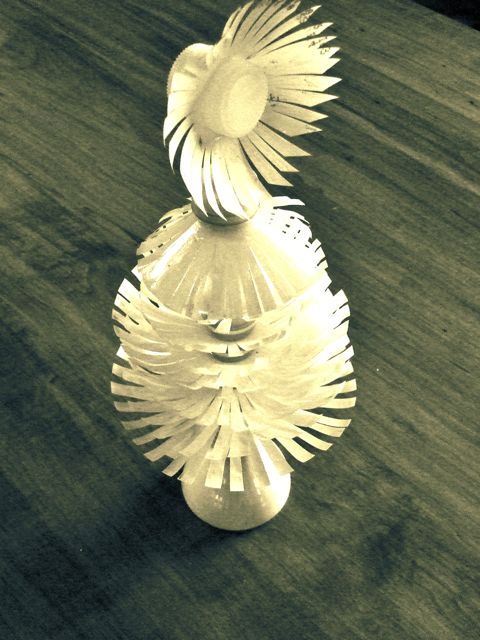
And your plastic bottle Christmas tree is complete! Enjoy, enjoy!


Now please, have yourself a fabulous day!
Very cute Michele! It always surprises me what you come up with. Love it!!
I LOVE the tree idea! And I always like all white things, always have, always will. Very nice!
it´s a great idea! congratulations!
What fun. Thanks for sharing it 🙂
A x
Just lovely! Looks very stylish. If I have enough time, I'll try to make one for sure. I have already collected some bottles!:)
Oh this is sooo neat! Your recycling has inspired me, I am working on decorations that are made of old window screens. I won't have a blog for a while, as its taking a little more time, and I am traveling for the holidays. But once I get it up, I will definitely send you some love and the post!
this is super cute idea…thanks for sharing…
oMG, this is outrageous! And kind of magic. I can't believe how cleverly it turns into a tree with a TRUNK from the bottlenecks. I am slightly agog. LOVE.
You are just so clever. Your photos are amazing, too. It's hard to take pictures of white translucent things!
What a fun idea! Looks really cool Michele!
Those are so incredibly cool – love the brightness and retro feel.
Terrific! Almost makes me wish I hadn't bought a soda waterr maker. Don't have any more plastic bottles. I guess I'll have to raid the neighbors trash!
Kathy
What a GREAT project! Thanks for linking it up to Thrilling Thursday @ Paisley Passions 🙂
That is so cool! I love the way you come up with these things. We have plastic refuse issues here in Bali, and I am trying to find ways to recycle/upcycle some of it. Thanks so much for sharing your ideas.
This is just fantastic!
I absolutely love it! I'm doing a couple recycled material ornaments too here:
http://sceneofthegrime.blogspot.com/2010/11/recycled-christmas-detergent-bottle.html
http://sceneofthegrime.blogspot.com/2010/11/recycled-christmas-vintage-frame.html
I'd love for you to check em out! You do great work! TFS!
Your projects are awesome! I would never have thought of this. I'm looking forward to the next!
http://www.amaskellantics.com/
I like this but it looks more like a victorian lady to me …..sorry
Jan
sssssssssssssssuuuuuuuuuuuuuuuuuupppppppppppppppppeeeeeeeeeeeeeeeeeerrrrrrrrrrrrrrrrrrrrbbbbbbbbbbbbbbbbbbb
Cute idea, but I wish you hadn't used newspaper to show what you did. I couldn't tell too well how you did it.