Hi there. I’m late. Sorry about that. The boy has had the flu all week… He’s quite ill… So my attention has been elsewhere. But, I squeaked out a post, thank goodness. Shall we get to it? Let us go.
Welcome to the third installment of Series 4 – The Candy Wrapper Chain! To see what fun I’ve been having with these nifty chains, visit my previous entries in the series: Installment 1 and Installment 2.
Today I’ll be showing you a few different things:
- How to make a large quantity of chain links in very little time [which makes this a much more efficient project than when I first learned (two weeks ago now… so long ago…)]
- How I’ve used the chains as a frame in a couple of different projects.
- How to make the rosette I first made in Installment 1.
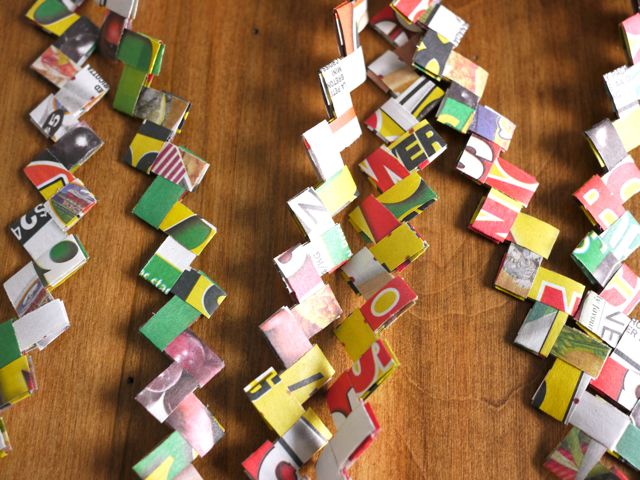
Making Lots o’ Links
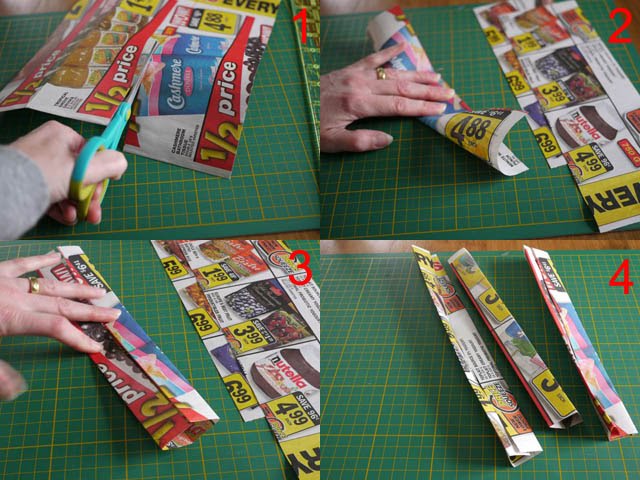
1. Using junk mail, or phone book pages, cut out narrow sheets. Mine are 3-3/4″(9.2 cm) wide (this measurement allows me to get 2 strips from 1 phone book page, but I make all my strips this width for consistency’s sake).
2. Fold a strip in half lengthwise.
3. Unfold the strip, and fold the long edges in so that they meet the center fold. Refold in half lengthwise.
4. Fold all your strips in this way.


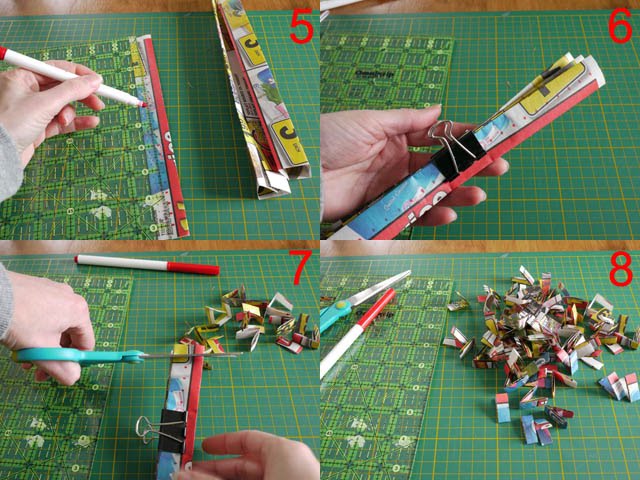
5. Mark a strip at increments of 3/8″ (1 cm).
6. Clamp several folded strips together using a clip.
7. Make links by cutting through all the folded strips at the marks you made.
8. You’ll get many many links in no time.
Now you have everything you need to make the chains. Here’s the video tutorial that shows how to do that! It’s surprising how long a chain you can make during an hour-long TV show… Have fun!
Making a Frame
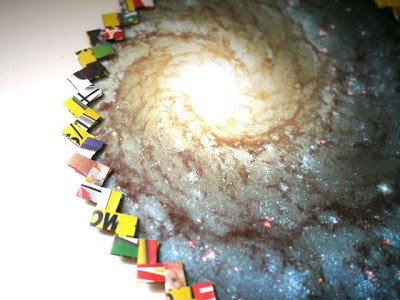
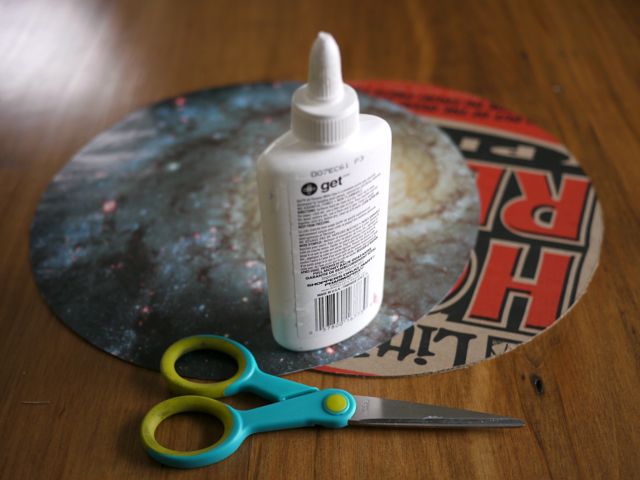
For my first project, I cut a slightly larger than plate-sized circle from one of the months of an old astronomy calendar (could not throw it out… could not). I also cut a similar circle from a pizza box. Then I glued those two circles together.
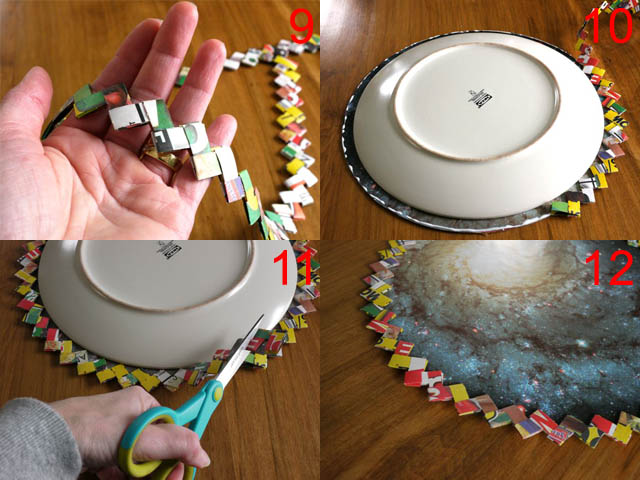
9. To frame my picture, I took a chain.
10. After placing a plate in the middle of my calendar picture, I applied a bead of white PVA glue around the perimeter of the circle. I then placed my chain on the bead of glue using the plate as a guide to keep the chain along a nicely circular path.
11. I trimmed the chain and inserted the end links into each other and glued them in place.
12. I removed the plate, and voilà, a picture framed!
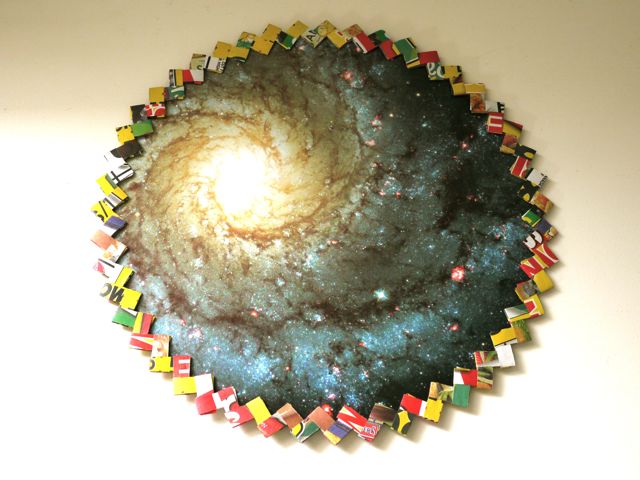
The “framed” astronomy calendar page will decorate the closet door of the boy’s bedroom. I’ll be making a few more of these to create a unique astral door decoration!

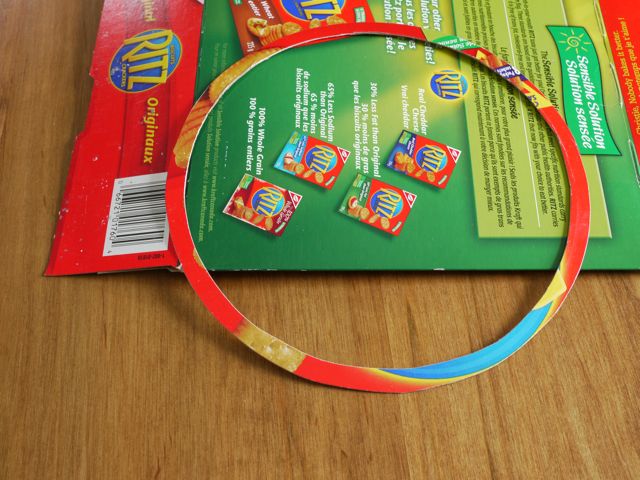
For my next project, I cut a circular ring out of a cracker box, and glued two chains to it.


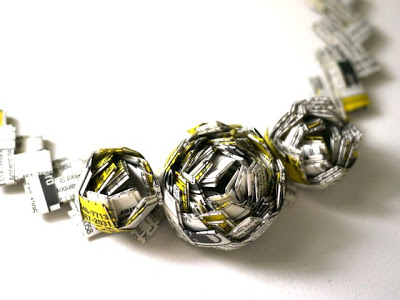
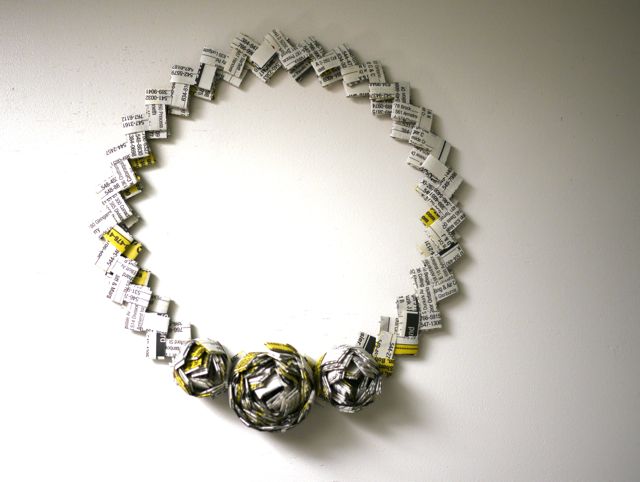
Making a Rosette
I made a few little rosettes as shown in the following photo. And glued those on my ring…

… creating a sweet telephone page candy wrapper chain wreath!
I can imagine adding a few coats of paint to this wreath and framing a round mirror or a simple clock face with it, can’t you? The possibilities never end, do they?

Well, now I’m off to tend the sick…
Have a healthy weekend and I will see you again soon!
I’ll be linking here!
I'm sorry to hear that your little guy is sick. The flu landed me in the hospital one year. Keep him hydrated! I hope you and your husband stay well.
Just a quick note to let you know that a link to this post will be placed on CraftCrave today [26 Feb 12:00am GMT]. Thanks, Maria
Love it Michele. I haven't try this yet, but will do soon – thank you for a great tutorial – Hugs Nat
Oh i do hope he is well soon Michele….love your tutorials.
Hi, I'm so sorry that your little boy is still sick…
I like your chains, but i like more the astute way you make them!!!!
When I saw the calendar picture I thought was painted with purpurin…
Ps, sorry for my rusty english….
These are totally awesome..you always share extraordinary stuff !! so its nice as usual 🙂
I wish u & ur family stay safe & healthy from seasonal reactions..hmmm
Ohh,i wanna say thnx to you also,you write lovely comment about me on my feature at Mod Podge Rocks blog..
Thanx..stay blessed
Melhoras. Gripe é terrível mesmo.
Olha, esse trabalho me remeteu a lembranças belíssimas da minha vida…Da minha mãe!!! Ela fazia muito e eu ficava encantada.
Dá pra fazer coisas lindíssimas. É só das asas à imaginação e voar.
Bom final de semana.
Bjs mil
The last wreath is my favourite, especially with the little pops of yellow from the phone book pages. And of course, the rosettes are fabulous.
p.s. Have you heard of Greencraft magazine by somerset studios? They have an ongoing feature called from the bin, I think you should submit your projects.
Thank you for this post, I am soooo going to try this out! 🙂
-Joy
I have never been able to make these right. There are such possibilities with paper and chain. Thanks for sharing another idea. I think I may have to give it a try again.
I hope your little guy gets better soon!!! I just love these! Especially the rosette wreath!!
Very nice! I like the lampe.
Christine
Oh, poor little dude, hope he starts feeling better asap. These are lovely, the flower wreath is completely WOWZER!!!
Just love thewreath you made! Beautiful!
it´s great this work, and i hope your little guy gets better right now! kisses
Hi Michele, great to see you, and thanks for sharing despite pressing family matters— good health for all! Love this wreath, as kids we used to do this with gum wrappers and I've been wanting to try it again, so thanks so much for the inspiration and for sharing on Craft Schooling Sunday!
More neat projects, Michele. I still love that rosette… amazing! It looks great on the frame.
Hope your son is recovering:)
Lots of neat ideas!! I've been saving my rice bags for a year planning on making candy wrapper chain bags…haven't done it yet!!
i love that wreath just as is michele! so neat 🙂
Hey there Michele!
Sorry to hear about the boy, I hope he gets better soon 🙂
P.s…I love your telephone book necklace!
This is such a cool idea. I've always wanted to know how to make these chains – thank you for the awesome clear tutorial! And those flowers are just so sculptural and pretty.
I found you on Creative Jewish Mom. I love the wreath! The rosettes remind me of artichokes (in a good way). Lovely work.
I must tell you that we made these chains from gum wrappers when I was a girl. The teen girls made them the height of their boyfriend and hung them in their rooms or rolled and hung from the car mirror. The same era that the going-steady-girls wrapped their guys' rings in angora yarn and brushed it all fluffy-like around the stone.
Yup! I am an old reader here…
🙂
Sweet to see this again.
What a hoot!! It brought back sooo many memories. I had begun making a chain out of gum wrappers when I was probably in the 8th grade (many many MANY moons ago). It's about 15 feet long and I STILL have it along with some stick gum wrappers that haven't been used yet. It also brings back memories of the Adams gum and Zebra Stripe. It's fun to take it out from time to time and walk down memory lane.
I remember also. I used to make them out of gum wrappers too!! 🙂