While Lo was away on business this week, The Boy and I made…Oh you guessed already? How’d you manage that? Well you’re right! We made Tissue Box Landscapes! This is a sweet and satisfying craft the whole family will get a kick out of.
Here’s how we did it!
Tutorial: Tissue Box Landscapes
For this project, you will need:
- one tissue box per person
- a piece of corrugated cardboard
- a variety of paper scraps (I used odds and ends from various past projects like this one and this one. The hand-painted bits and pieces are especially fitting for a project like this!)
- ruler
- marker or pencil
- utility knife
- pair of scissors
- glue
- clothespins for clamping
- large needle
- string
- black craft paper (optional)
Step 1: Gather your tissue box, utility knife, marker and ruler.
Step 2: With the ruler and marker, draw a straight line roughly 1/4 inch (6mm) from the top edge and all the way around the box.

Step 3: With the utility knife, very carefully cut off the whole top of the tissue box along the marked line using your ruler as a guide.
Step 4: You might find that the corners of the tissue box have pulled apart while cutting. Glue them back together and clamp them with clothespins. Allow the glue to dry.
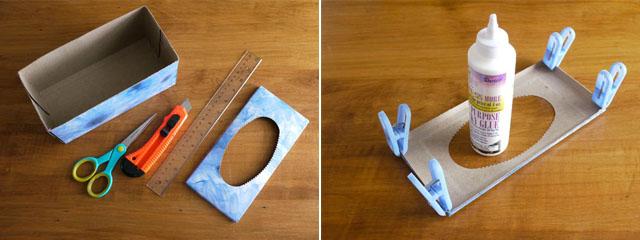
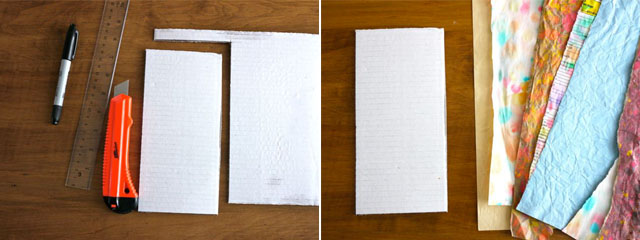
Step 5: Measure the inside width and length of your tissue box top and transfer those dimensions to your piece of corrugated cardboard. Cut out the resulting rectangle.
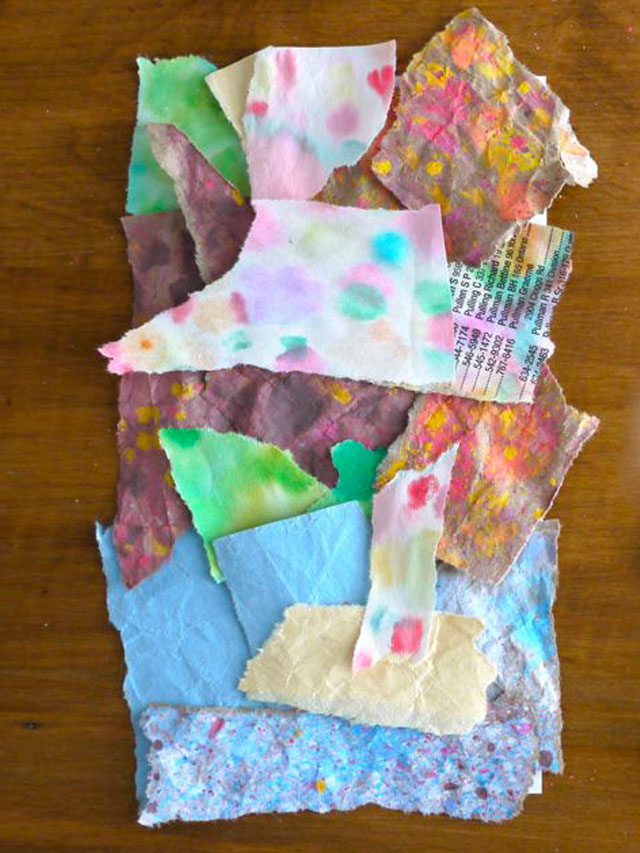
Step 6: Gather some pretty paper scraps.
Step 7: On your cardboard rectangle, place scraps of your paper in a pleasant sequence down the length. Play with the placement of papers until you’re happy with what you see. Without messing up the sequence you’ve created, slip the bundle of papers off your cardboard and off to the side. Notice the edges of my paper scraps are ripped. This will give your landscape a soft look. If you want more distinct lines, cut the edges with scissors.
Step 8: Now take the bottom-most piece of paper from your sequence and glue it onto the cardboard. In my case, the bottom-most piece was at the very top of my sequence.

Step 9: Continue glueing the pieces on the cardboard just as you had them in your sequence.
Step 10: Once they’re all in place, flip the cardboard around and trim the paper scraps to the width of the cardboard.

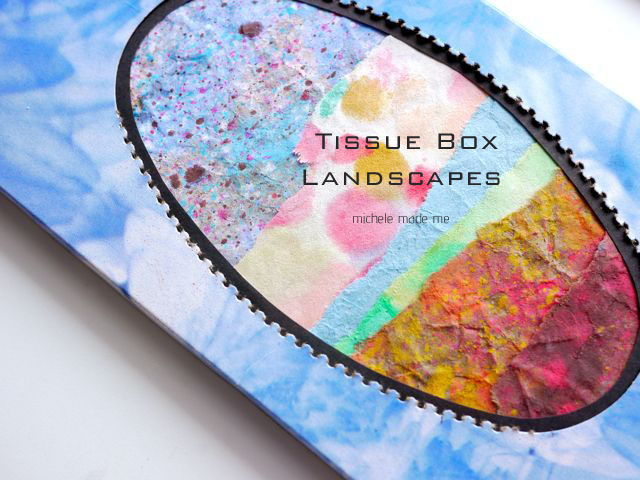
Step 11: (Optional) At this point, I realized that my landscape was very similar in colour to my tissue box frame. To create contrast between the frame and artwork, I cut out a simple mat from a piece of black craft paper. I used the hole in the tissue box as a guide, and made the hole in the mat slightly smaller.
Step 12: (Optional) I glued the mat into the frame.

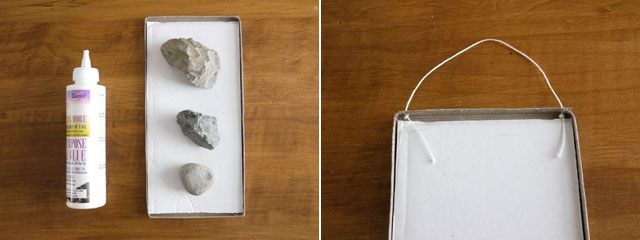
Step 13: Now I glued the landscape into the frame being careful to avoid putting the glue too close to the inner frame edges. While the whole thing dried, I placed a few rocks on the back to ensure good adhesion between those layers.
Step 14: Finally, I used a large needle and some string to make a simple hanger for my little landscape!
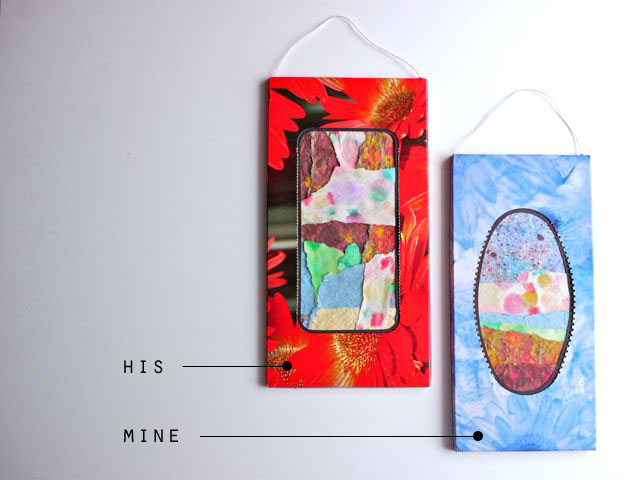
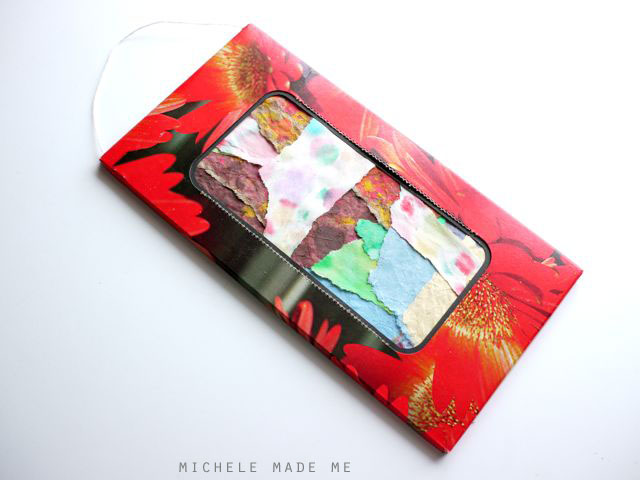
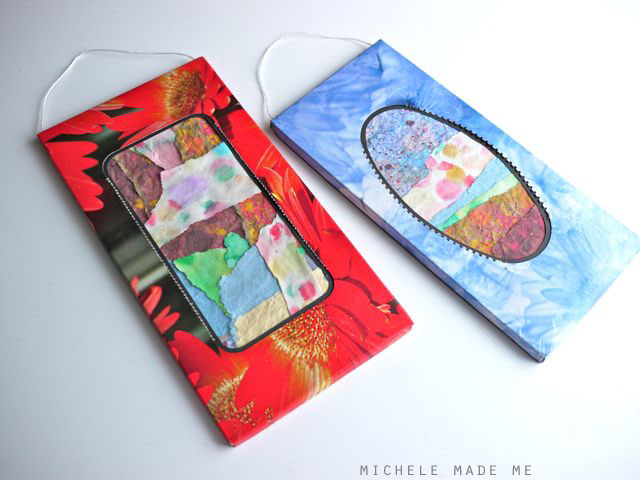
Here’s The Boy’s landscape arrangement pre-glueing…
And here it is at home in its tissue box frame…
Sweetness!
I guarantee this little craft will bring out your inner artist, no matter how deeply she may be hiding… So let her out and watch her make her own Tissue Box Landscape!
Divinely beautiful! And a great recycling project too!
a great crafty/recycling project!!!!
xxxx Ale
Amazing the crafts you come up with. They are beautiful!
So unique! Wow very nice and so easy. Thanks for sharing.
Fun little frames for anything! I do like the landscapes, too.
Hugs
Michele;
These are awesome!! I am going to add it to my list of things to do with my kids and @ recreate.org!
Sweetness – I love paper collage landscapes – something very peaceful about them…
They are both just fabulous! I absolutely love the 3-D-ness of the extra box edge bit. Neeeeato and sweeeeto!
Lovely idea!
inspired lol
Super cute & clever! Love this! These would make such cute gifts, too.
What a lovely project. Perfect for all ages!
I always thought the opening of tissue boxes looked like frames and it looks like I'm not the only one who thought that. Love what you did. How fun to do these craft projets with kids! I love seeing how they make them their own.