Don’t know if you know, but it is September and I’ve joined a group of crazy craft bloggers in a quest to “bust some stash”. I know it sounds violent and conjures up images of hairy-faced goons going at it in dark alleys. But I assure you, it is quite peaceful and good.
It is called Stashbusting September and it is being run by the lovely Robin over at The T-Shirt Diaries. The goal is to craft using stuff we already own. In other words: NO shopping for new craft supplies. NO thrifting. NO getting other people to buy stuff for us. NO combination or permutation of craft purchase for the WHOLE of September on pain of death (okay I made that “death” part up). But you get the picture.
And seriously, it is ridiculous how much of a delicious piece of cake this is going to be. I laugh in the face of this challenge. Hee hee hee. And that is because I have SO MUCH CRAFT STUFF! I have been hoarding things since 1968 in preparation for this very moment. Scads, gobs, reams, hillocks, heaps, piles, oodles, stacks and yes, plenty o’ stuff with which to make glorious crafts. No problem. Easy peasy. BRING IT ON BABY!!!!!!!!!!!
Shall I begin?…
First up: Handmade Wooden Buttons!
Break out your electric miter saw AND an old dowel from that closet you ripped out and re-did last year.
Cut the dowel up into small 1/4 inch discs. I cut out a whole whack of them. See?

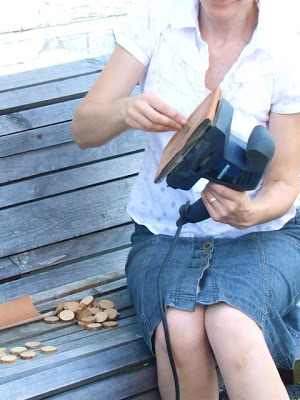
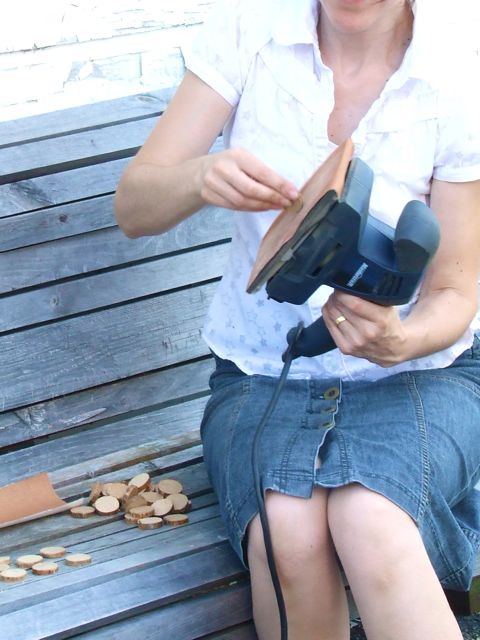
Take the power sander and sand down all those little discs nice and smooth. Don’t sand off your hands. You will need those later.
Also, wear a skirt while doing this so the neighbours can titter at you from their driveway.
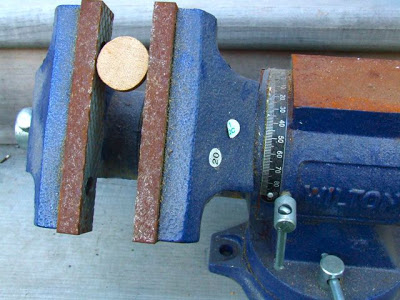

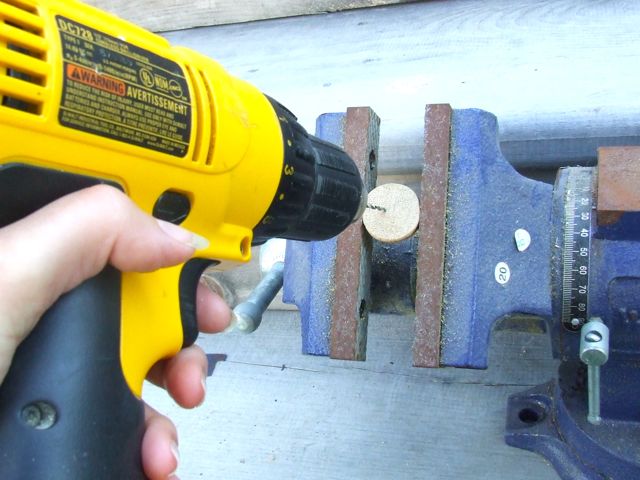
Clamp a disc.

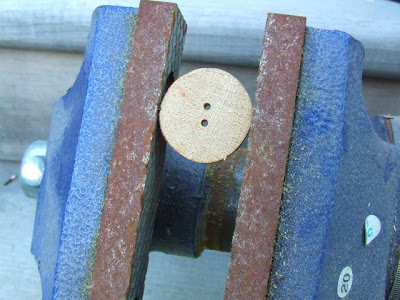
With a small bit, drill 2 tiny holes through your disc.
Voila! Button! Repeat this hole drilling process for all your discs.
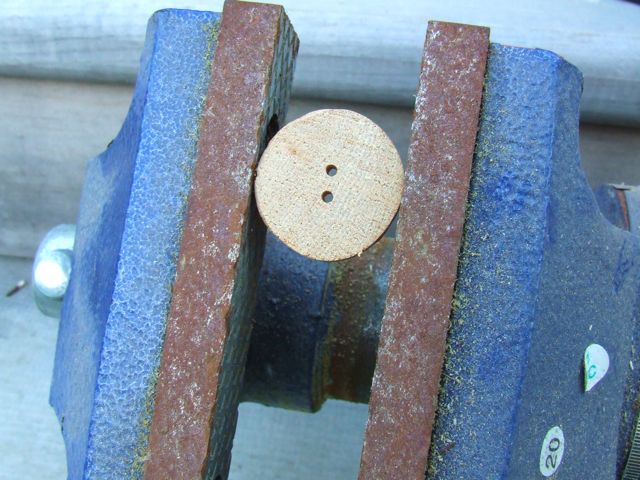
Now you could leave it at that. That would do nicely.
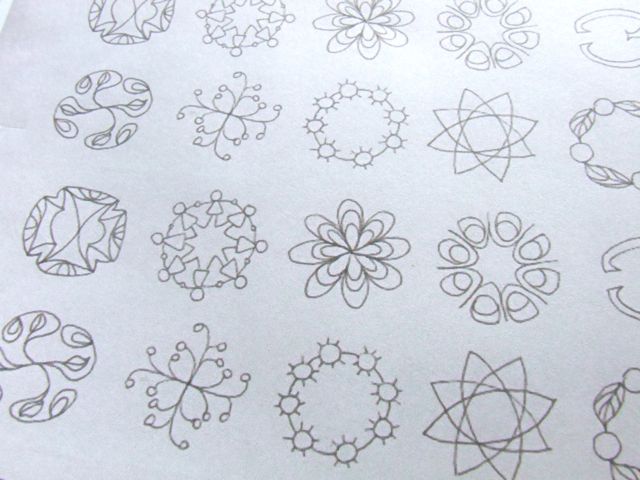
But I wanted some fancy buttons so I took a sheet of paper and created several designs.

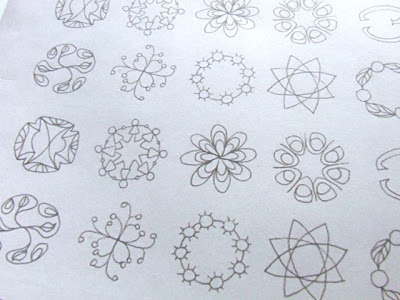
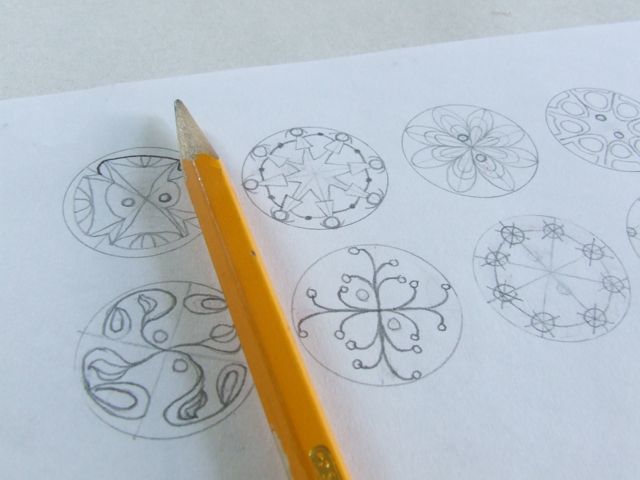
I scanned my finished designs into the computer. I brought them into Photoshop, copy/pasted the designs to my heart’s delight, and made a 8 1/2 x 11 sheet full of button designs. So pretty.
The next part I did not photograph.
To make a transfer of button designs:
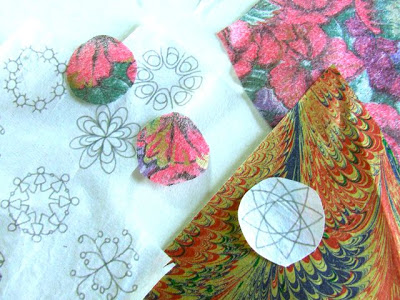
To make a transfer of my designs, I used freezer paper and white tissue paper. I ironed a piece of white tissue paper to the shiny side of the freezer paper. No steam. I cut this combined paper to exactly 8 1/2 x 11 and put it in my printer. I printed off the designs on the tissue paper side. I carefully separated the freezer paper from the white tissue paper and put aside the freezer paper. The white tissue paper is a transfer of designs that when Mod Podged onto my buttons will dry clear; only the design will be visible. (This process is inspired by this post of Sarah’s at Dolls and Daydreams. Thanks Sarah!).
So I took my white tissue paper transfer, and some other colourful tissue papers and cut out several circles slightly smaller than the size of my buttons.


I took out the Mod Podge, and a little paint brush.
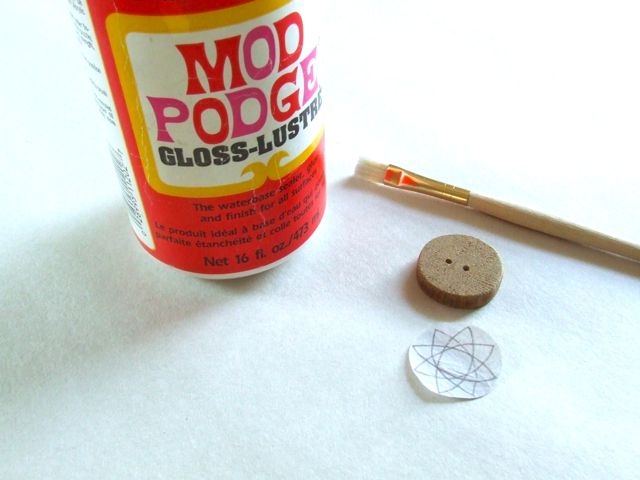
With the paintbrush, I applied some Mod Podge to the button surface and placed my little tissue paper transfer onto the button. And applied more Mod Podge on top of the transfer.
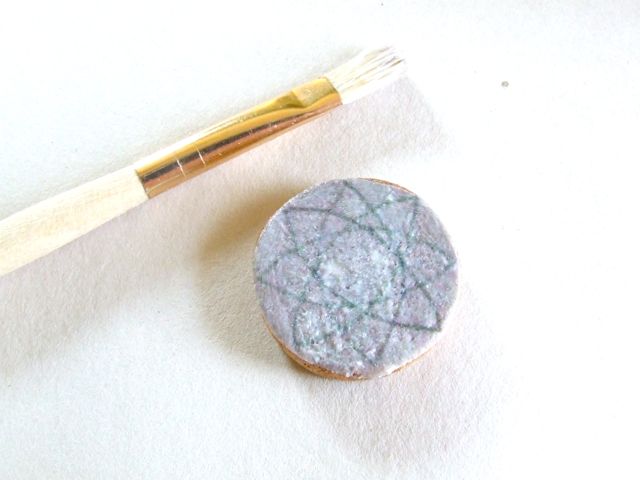
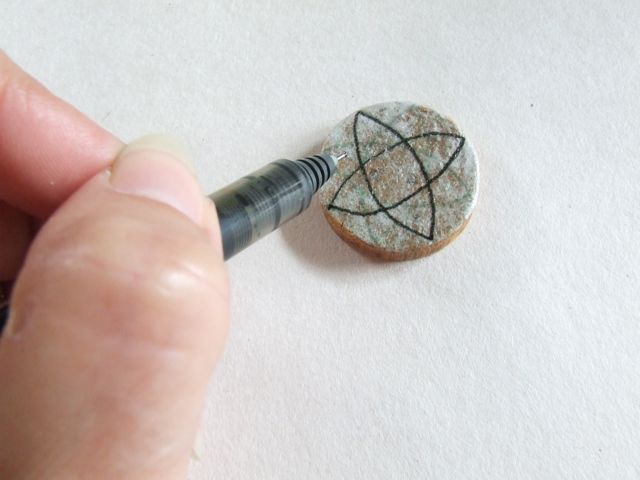
I allowed it to dry (mostly) and then traced the design with an indelible marker.
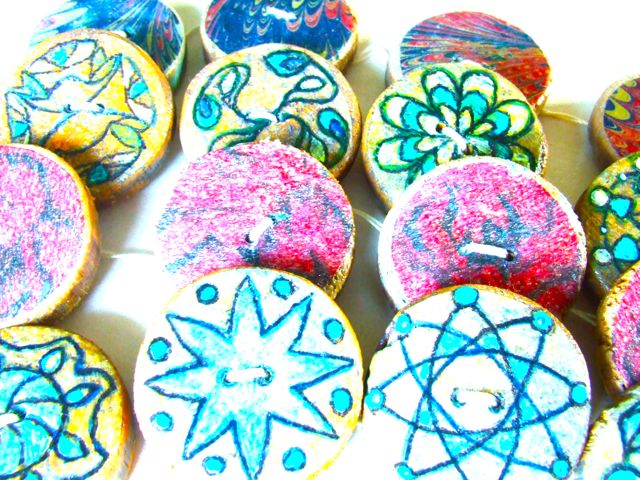
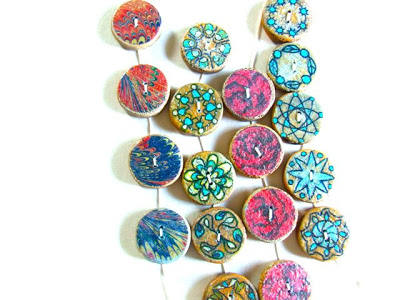
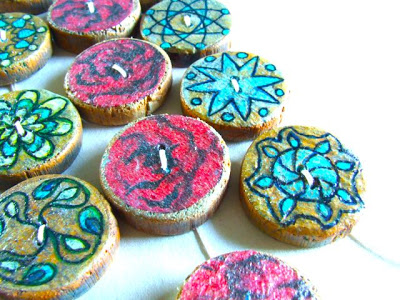
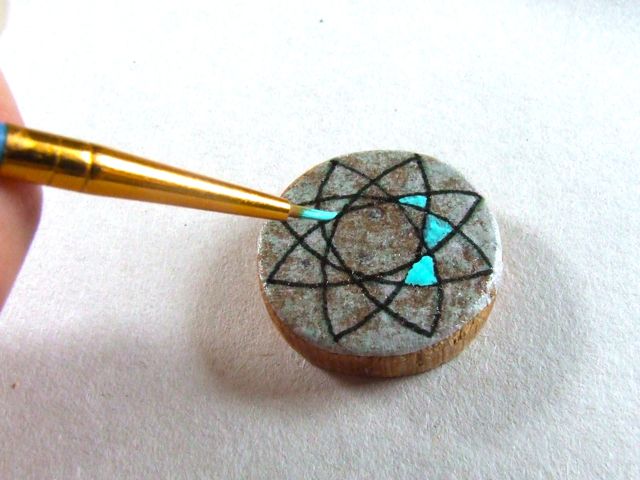
And then painted it with liquid acrylic paint! The fun part. I did this with some of my buttons.
Onto other buttons, I simply Mod Podged the pretty circles of tissue paper that I had cut out earlier.
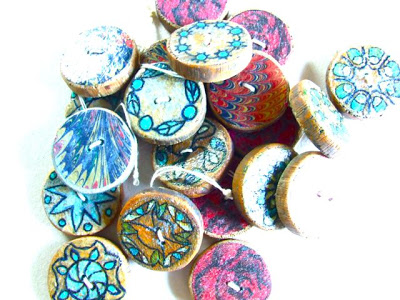
And here are the many buttons I made! Yippee!


Have a superb stash-busting day!
P.S. Linkin’ here.
Wow again Michelle! You never cease to amaze me with what your crafting next! This challenge is so up your alley! I love those wooden buttons but not so sure about using those power tools. Now there's a chllenge for the future for me! Such pretty designs.
First off, I wish I could type the friendly yet mocking voice I used when I read "But I wanted fancy ones." (You know that voice that annoys everyone? That one lol)
Second, your buttons are fantastic. Seriously, especially the ones that look like they were done with the oil paint on water technique.
Third, stash busting September sounds awesome, except I am already disqualified. A friend's mother in law just donated two giant garbage bags of fabric and notions to my sewing cause. At this rate I won't be able to find my table to craft with any of my stash!
Those buttons are genius! great tutorial and great job on busting the stash 🙂
Fantastic buttons. Love all the colours.
Love the buttons Michele! Now, I think you should find a safer sanding method though! There is bound to be a terrible accident doing it that way! Do you have any fingernails left? Heck, I scrape mine using a cheese grater nevermind holding tiny wooden discs next to a power sander!
Wow!! Those are adorable!! Love all the cute little designs. I also love the tissue paper idea! I'm going to have to remember that one.
Those are insane!! You rock at this, I think.
Oh, my, word that's a lot of work! BUT they are so cute! I am VERY tempted to try this. Great idea!
Just dropped by from The T-Shirt Diaries and I'm hoping to stick around for a while – I'll take that lemonade please.
Love the clean look of your blog and your fantastic tutorials 🙂
OOOOOHHHHH trop fort ! Encore des beaux boutons …. même nature , ça m 'irait …. I could maybe be helped for using the tool though ! I am scared of it and SOMEONE wouldn't agree to lend it to me …
And I could stand the challenge of re- using what I have !!! So , I'll try , even if there is no death penalty !!!
so. much. work!!! You are so blessed to be so detail oriented! I don't know if I could ever follow a project like that through to completion – a hundred things would distract me halfway through! I love the hand painted buttons! Great job Mich!!!
love,
Simone
I can't quite believe you MADE these buttons – from scratch! And they are so pretty! Do you know what you are going to use them for yet?
These are stunning. Mouth open in awe. I love them to bits! My favorite are the marbled paper ones! Fantastic tutorial, you are such a great teacher. Those neighbors can titter all they want, but will they receive any buttons this holiday season? I don't think so.
brilliant, from an old dowel! and you're so handy!
Great to have you and your creativity on Craft Schooling sunday, thanks so much for dropping by!
Oh wow- those are gorgeous! Talk about a conversation piece! I would love to link to this tut if you didn't mind.
That is one amazing project. You must be an artist at heart :).
great idea. sometimes not being able to go out and buy everything new for a project forces you to be more creative. good goin, i like your buttons.
These are absolutely adorable, Michele! LOVE the idea — and wonderful tutorial!! 🙂
WOW – those are so cool and I am so impressed with you ease of use with power tools !!!
I became a follower – please follow me
WOW!!! Those are so fun! I love them!
How pretty! Such fantastic designs!
This message is for Hazel: Hi Hazel! You left such a lovely comment on this post which I inadvertently deleted, silly silly me! I'm so sorry. You asked if there was any way to join this site. Well, you have a blogger account and therefore you can become a follower if you like. You do that by clicking on the word FOLLOW which is located just above the Followers grid on the right sidebar! I hope you find this message. Thank you for the kind comment!
Found you through Sugar Bee Craft Edition. These buttons are gorgeouS! I am a new follower. I hope you will stop by Lanie J. and Co. for a visit!~Lanie
Thanks for linking on Take-a-Look Tuesday over at Sugar Bee Craft Edition – I featured you today! Mandy, http://www.craftedition.blogspot.com
Oh my word, what a splendid project! these are too cute, and I just love the thought of using these to jazz up an old cardigan. Great stuff!
I never left your blog without a smile!
Great idea – I'll be featuring it on this week's Craftastic Monday!
Just have a suggestion. Would it be easier to drill the two holes in the dowl before cutting the discs out? Predrilling the holes you could drill 2 to 3 inches depending on how long your dill bit is. Just a thought.
You are so cute – I LOVE the sanding in skirt picture. These buttons rock!
This is just fabulous! Thank-you for the great tutorial. I am now a loyal follower! Can't wait to check out some of the older posts…I might be here awhile.